Chisel tests
Introduction
On the WoodCentral forums, David Weaver presented a method of sharpening chisels using a buffing wheel, which results in a sharper, much longer-lasting edge than normal sharpening methods, and is also faster, easier, and cheaper. Because it has so many advantages, it has been nicknamed the “Unicorn profile.”
This video shows how to use a buffing wheel to sharpen chisels, and demonstrates some chopping tests similar to the ones below.
If you want to see the equipment used and alternatives, see the Equipment section.
David Weaver’s article about the Unicorn method is here.
Chisel durability tests
The rest of this page contains tests of this method of sharpening. The test is simple and repeatable. This lets me come back later to run more tests, and be confident that the results are comparable. It also allows others to easily conduct similar tests so that they can confirm the results (or not!).
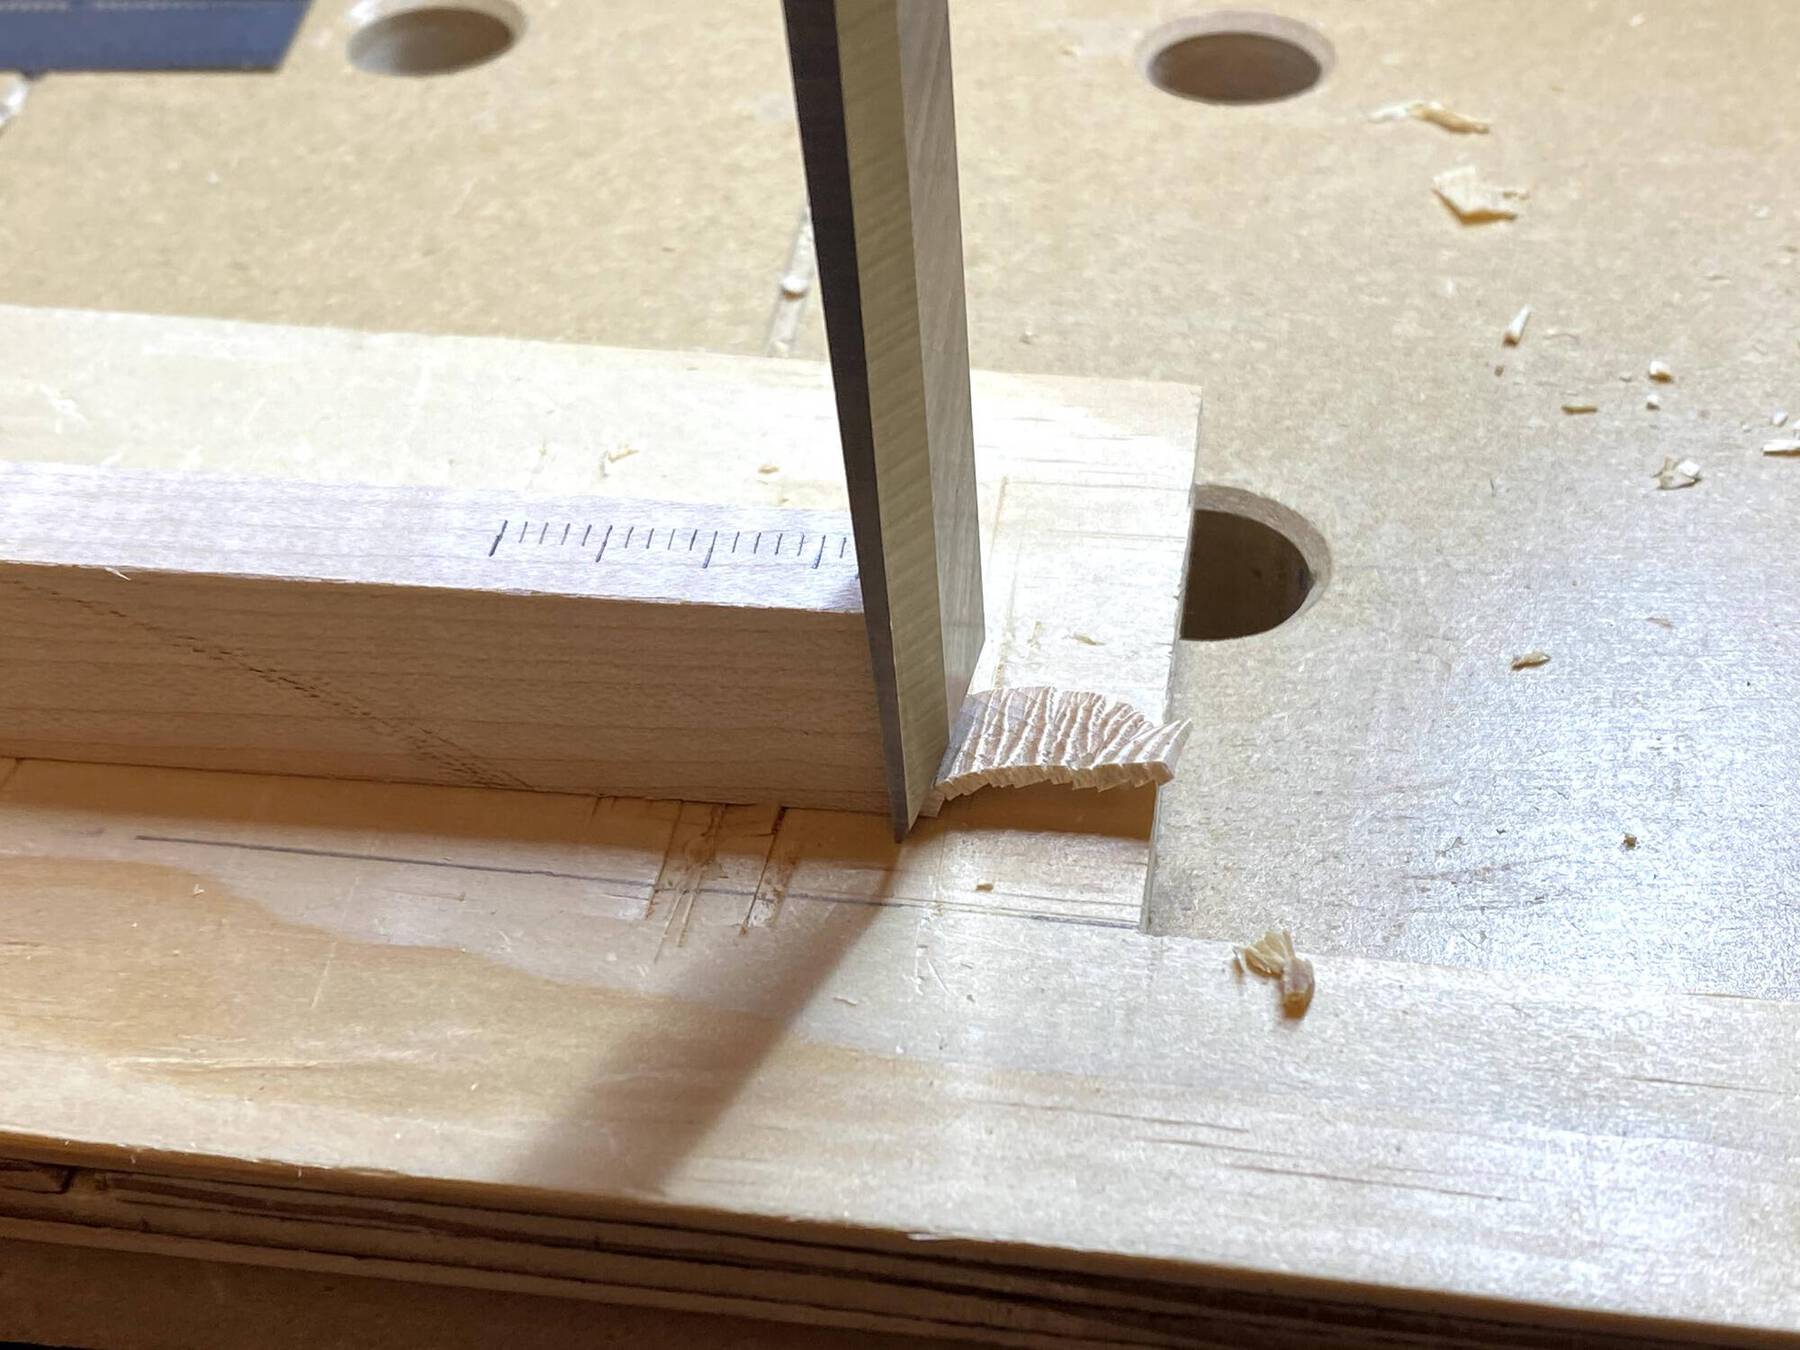
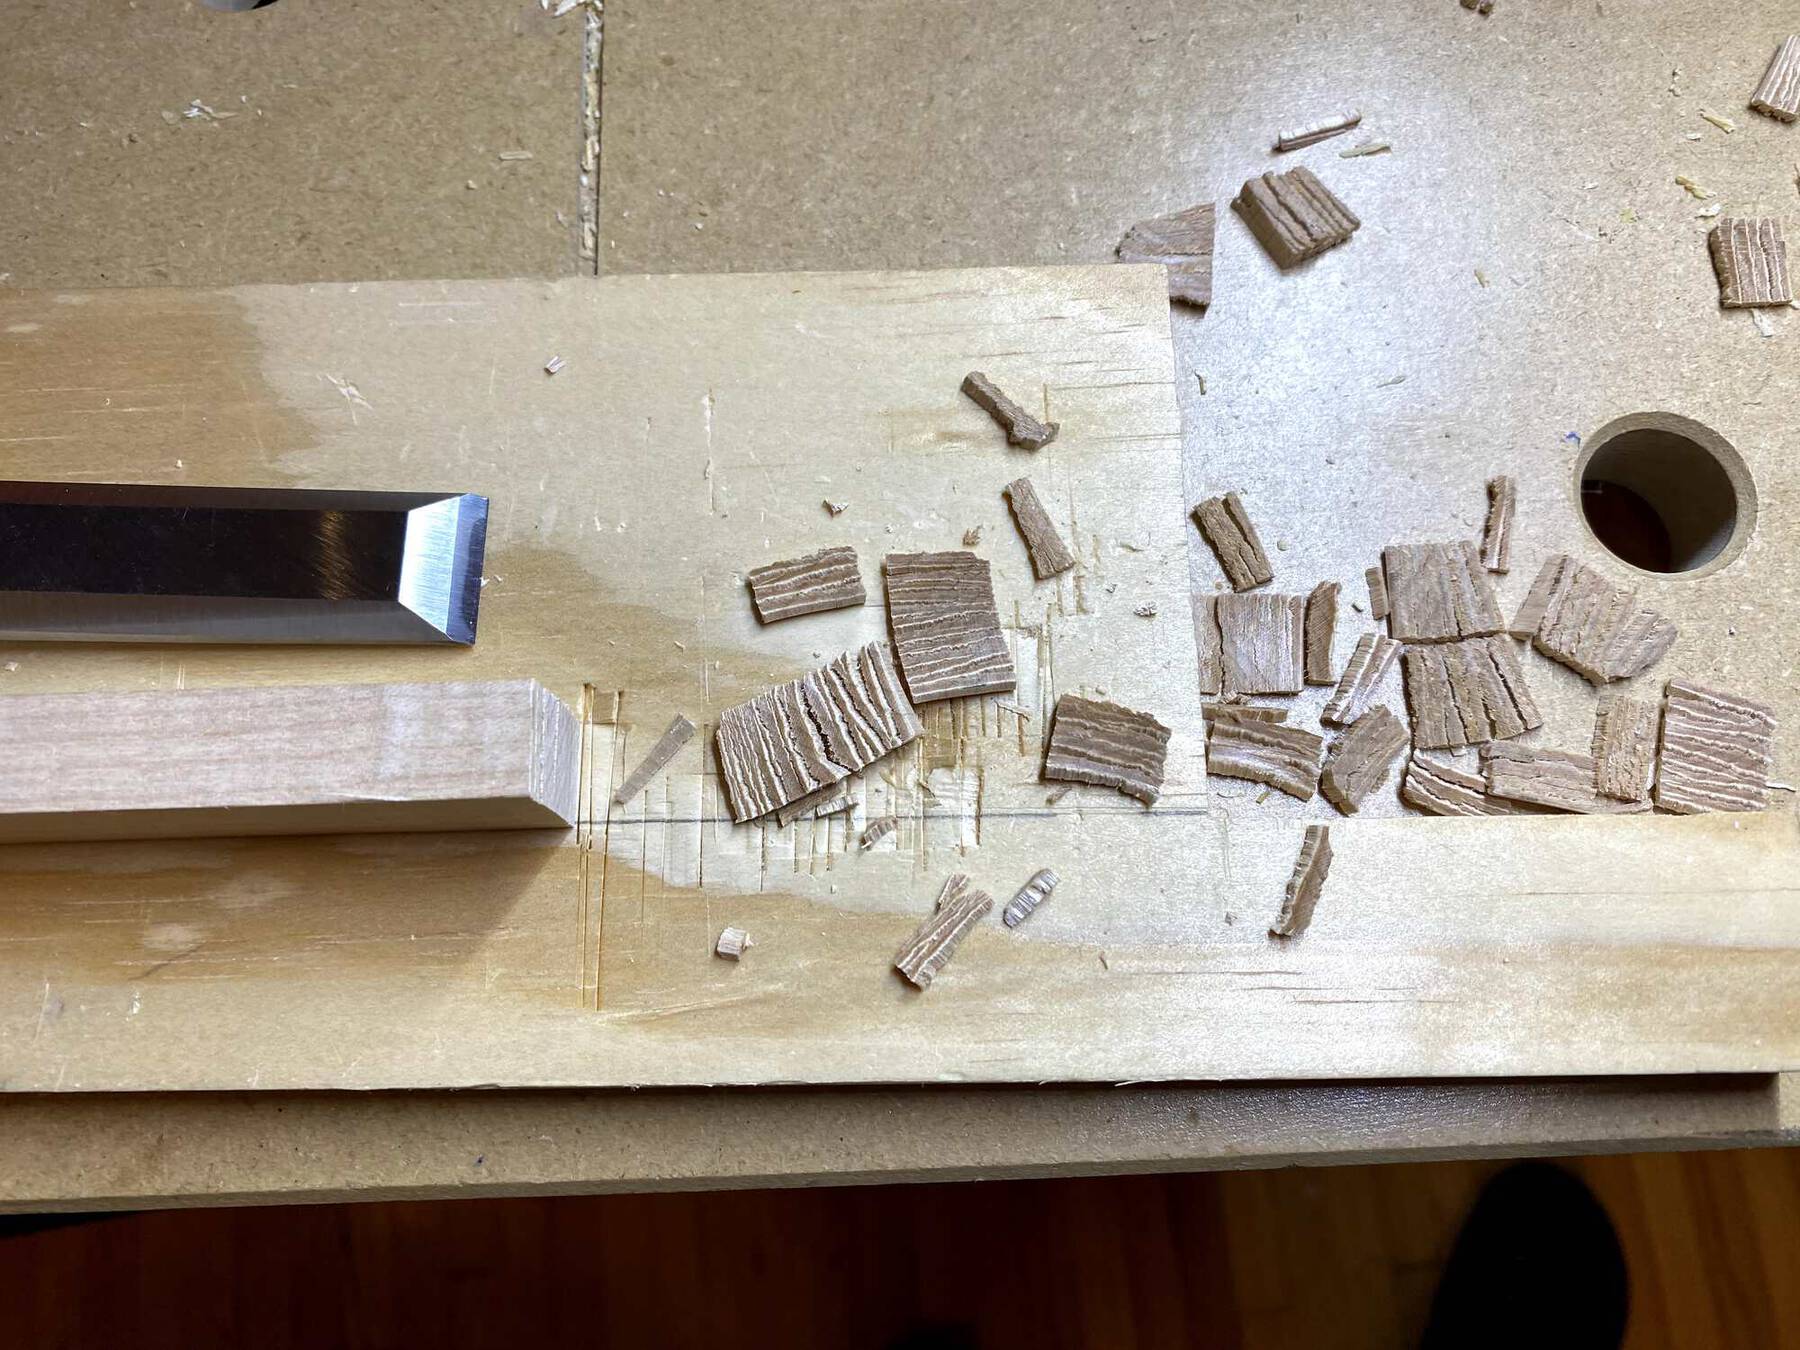
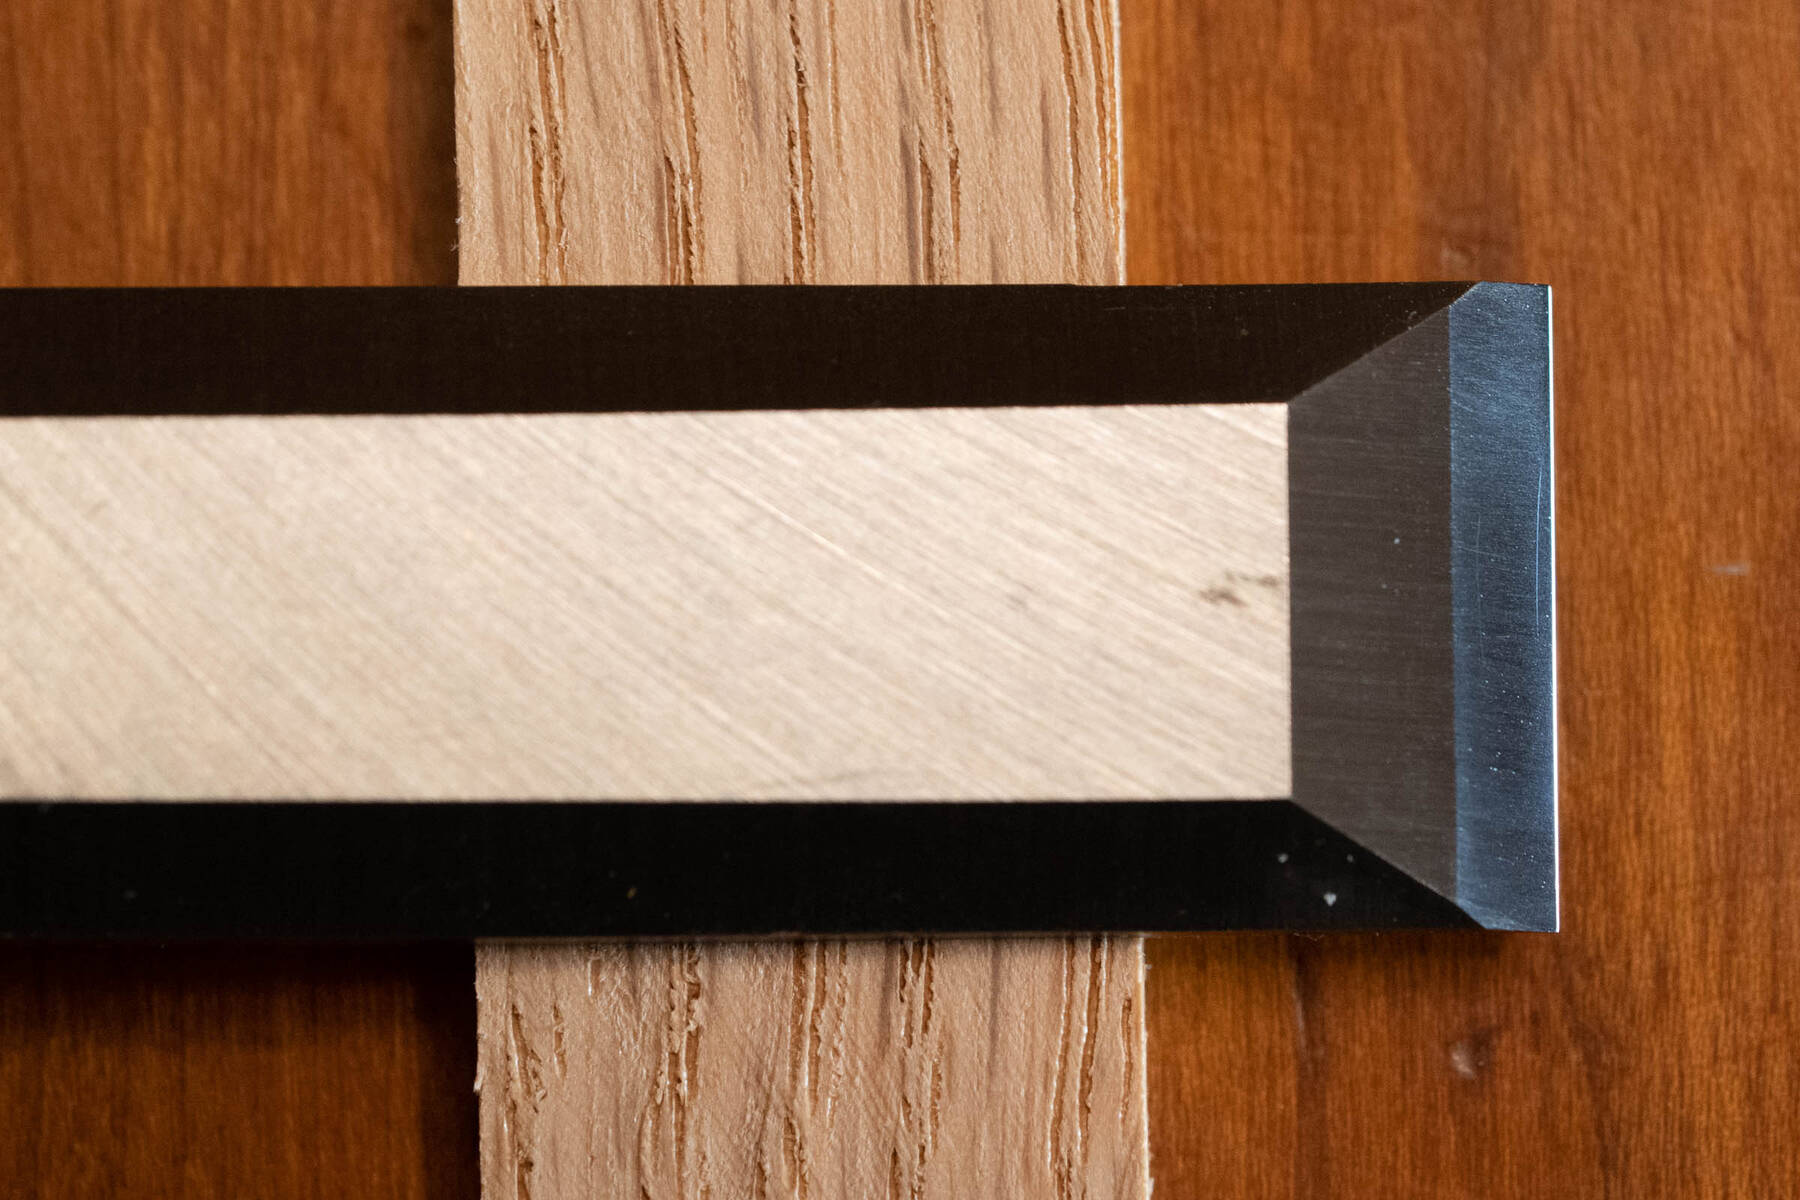
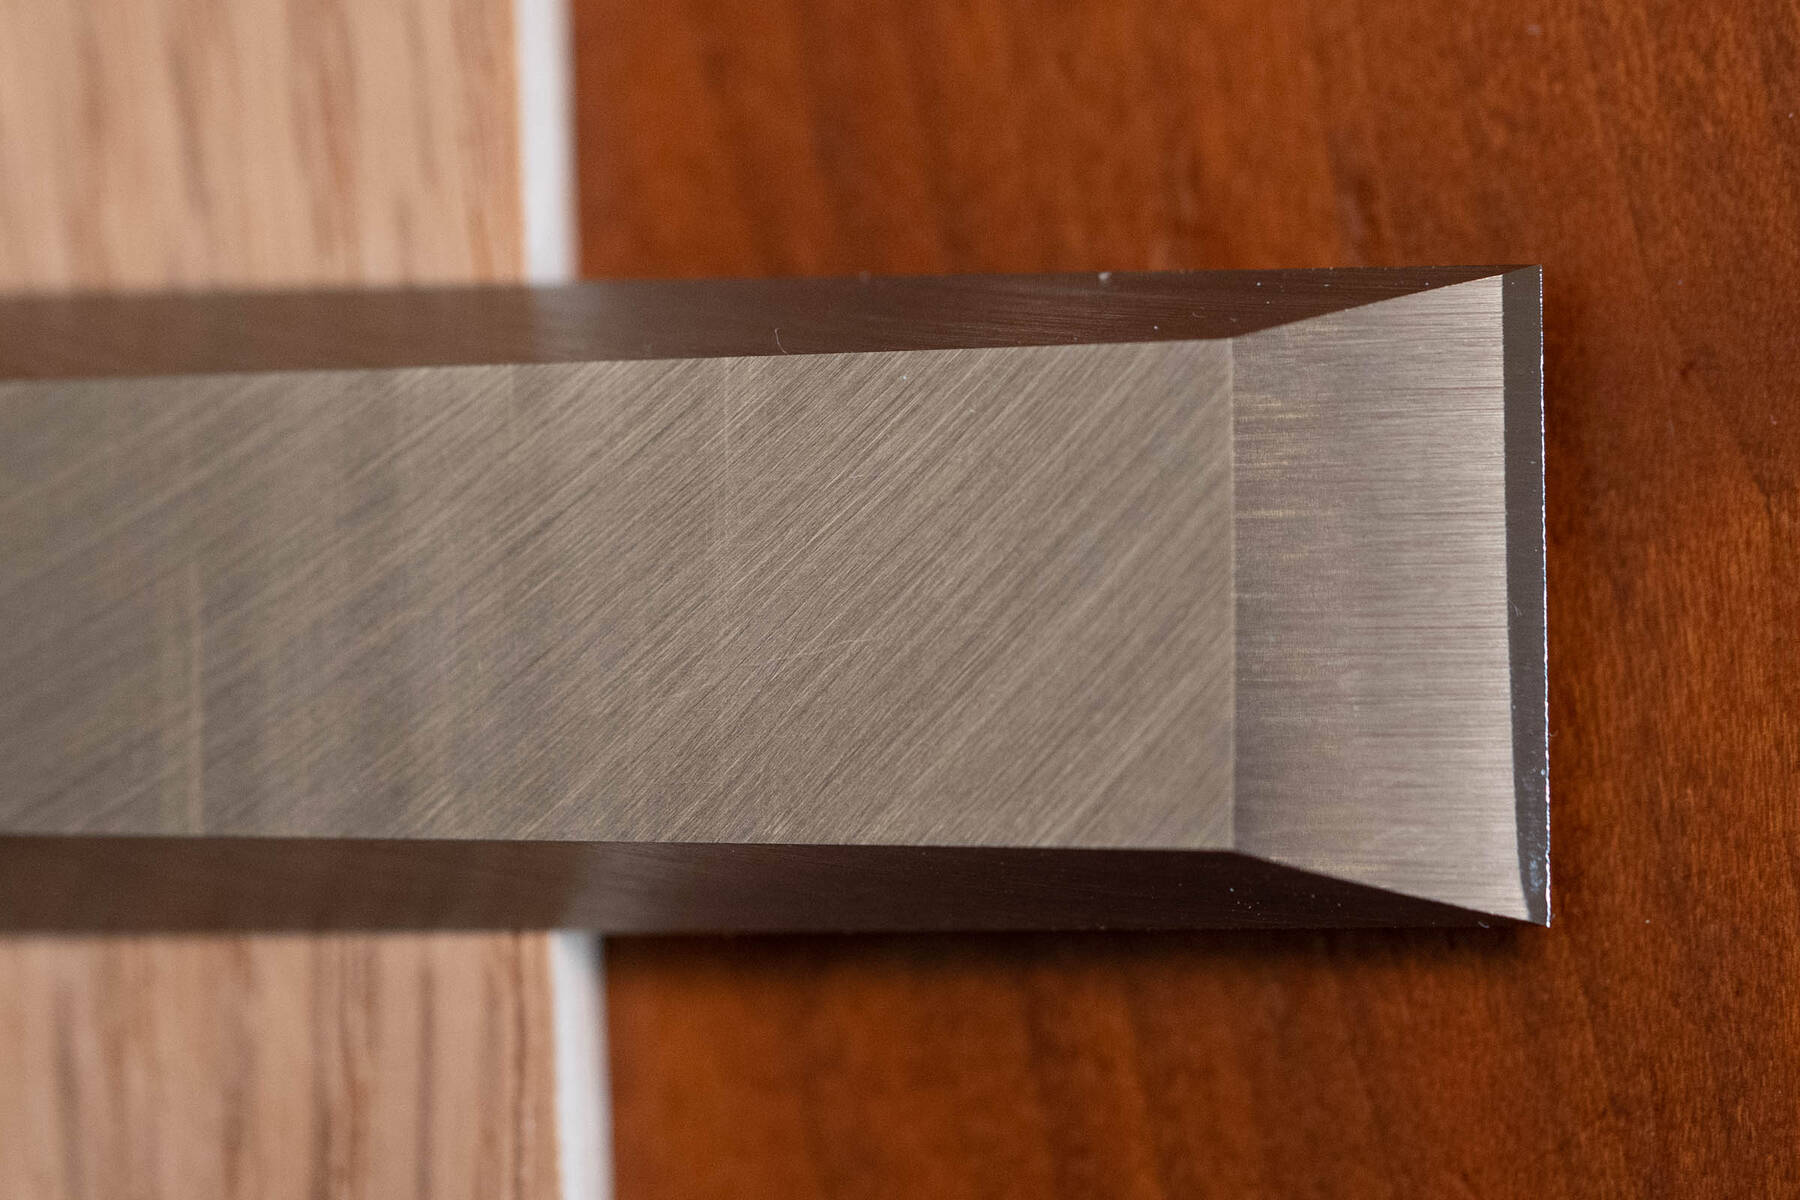
The procedure is simple: repeatedly chop through a piece of soft maple and see how much damage there is to the edge. The test piece was 3/4" thick and 1/2" wide, and the test involves chopping off 1/16" slices, for a total of twenty times. This is what it looks like:
So far I’ve used two chisels for testing:
- A 3/4" Buck Brothers chisel from Home Depot. At $21 for a set of three, this is a cheap chisel. I’ve found that the steel is relatively soft.
- A 3/4" Veritas chisel from Lee Valley. This chisel costs $100 and is widely regarded as one of the best chisels you can buy.
I sharpened these chisels a few different ways:
- Sharpened with a flat 30-degree bevel using a honing guide, and finished on a Shapton Pro 12000. (Technically, this would be considered a secondary bevel, since the Buck Bros chisel had a lower-angle factory grind, and the Veritas was hollow-ground.)
- Sharpened to 30 degrees on a Shapton Pro 1000, then buffed. Only the bevel was worked on the stone. The back of the blade didn’t touch the stone; buffing the bevel side removes the burr.
- Sharpened to 30 degrees on a Shapton Pro 1000, then stropped at about 40-45 degrees on a leather strop charged with 1 micron green compound. (The compound is made by JacksonLea, and was ordered from McMaster-Carr.)
Each test below also has a link to a Full Progression page, which contains photos of the chisel after 0, 1, 2, 3, 5, 10, 15, and 20 pieces chopped, so you can see how the damage progresses as the chisel was used.
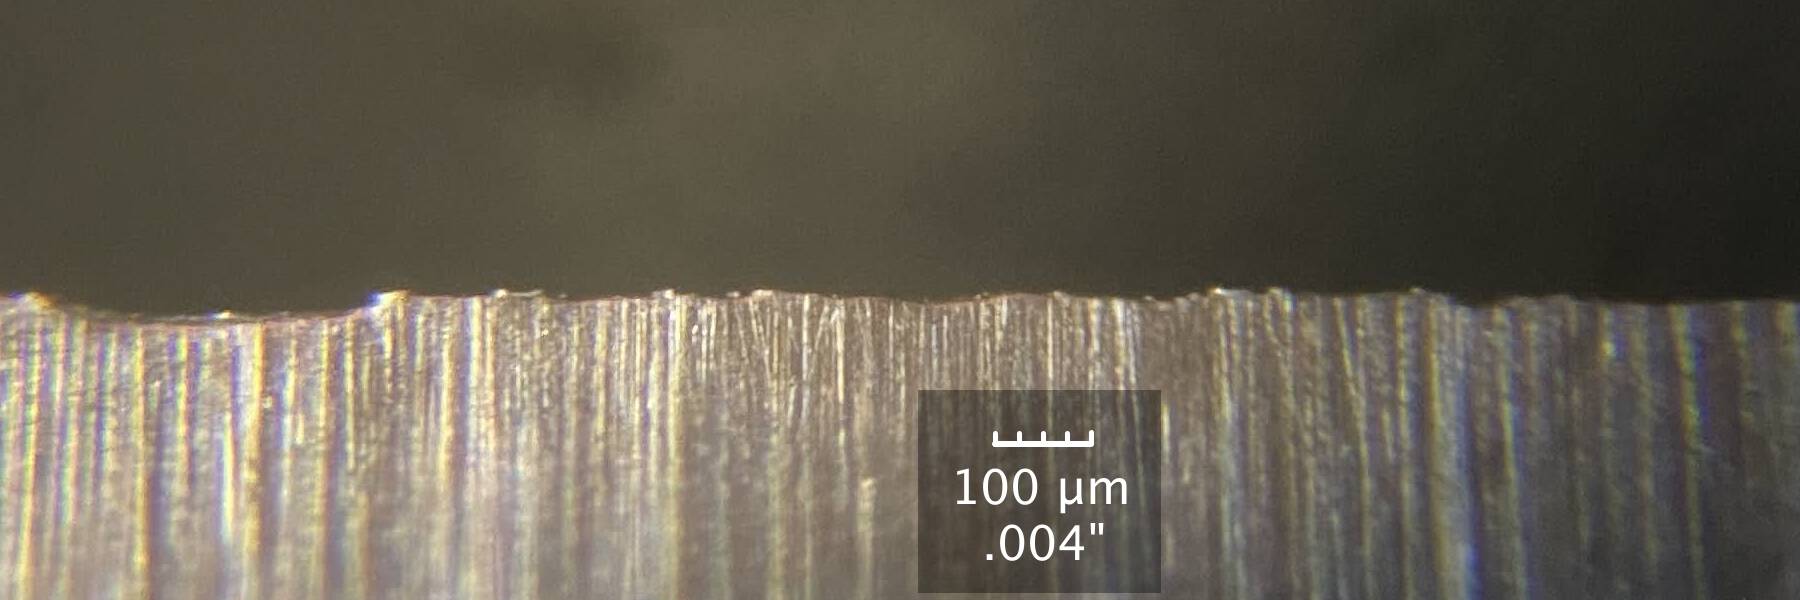
Buck Brothers, flat bevel
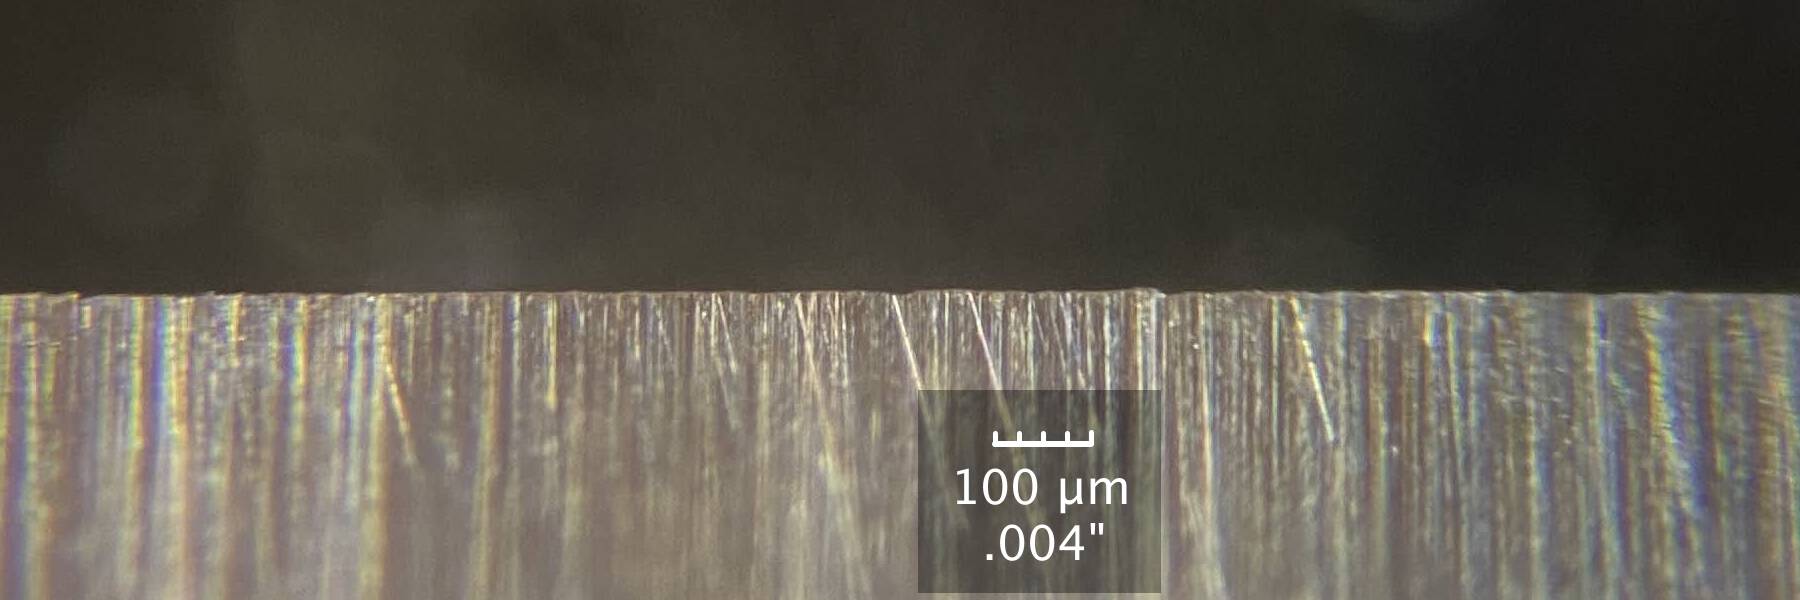
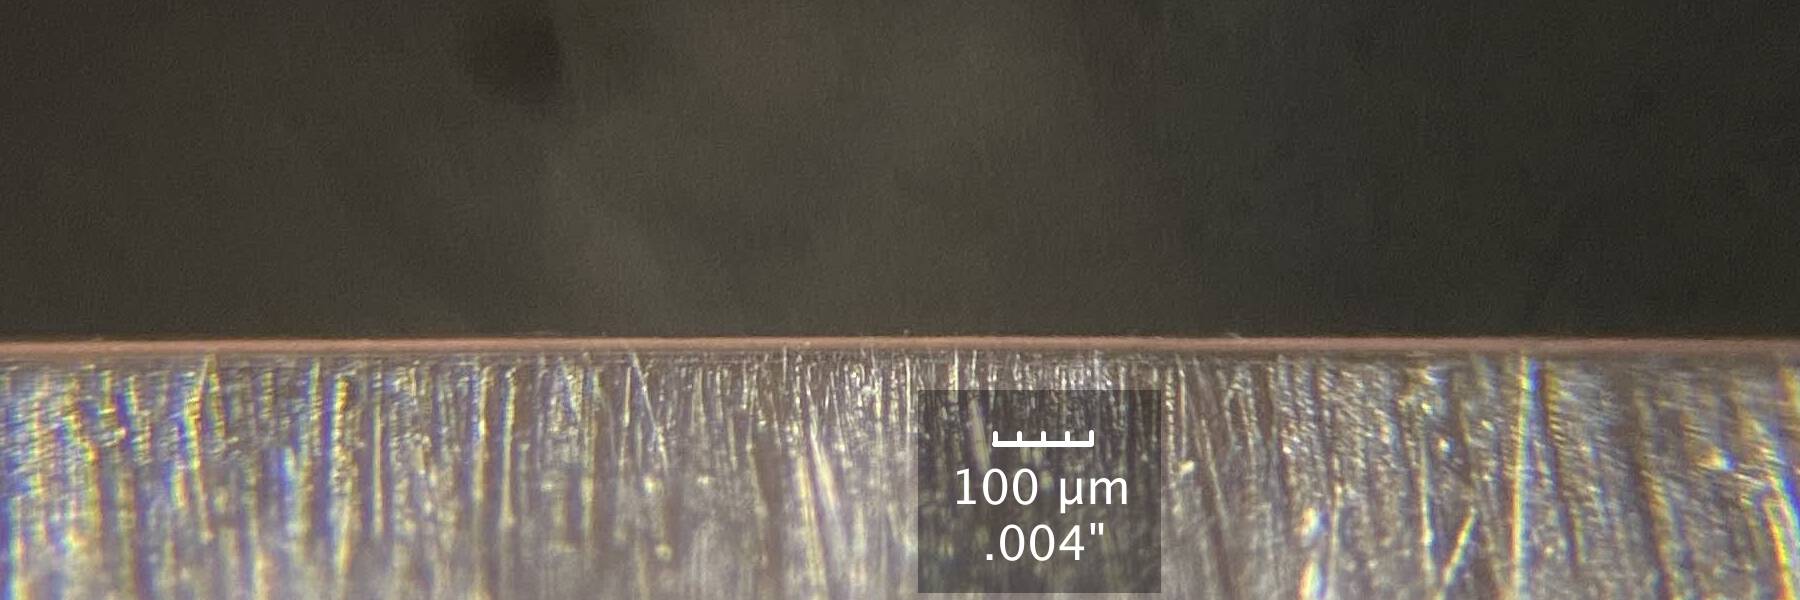
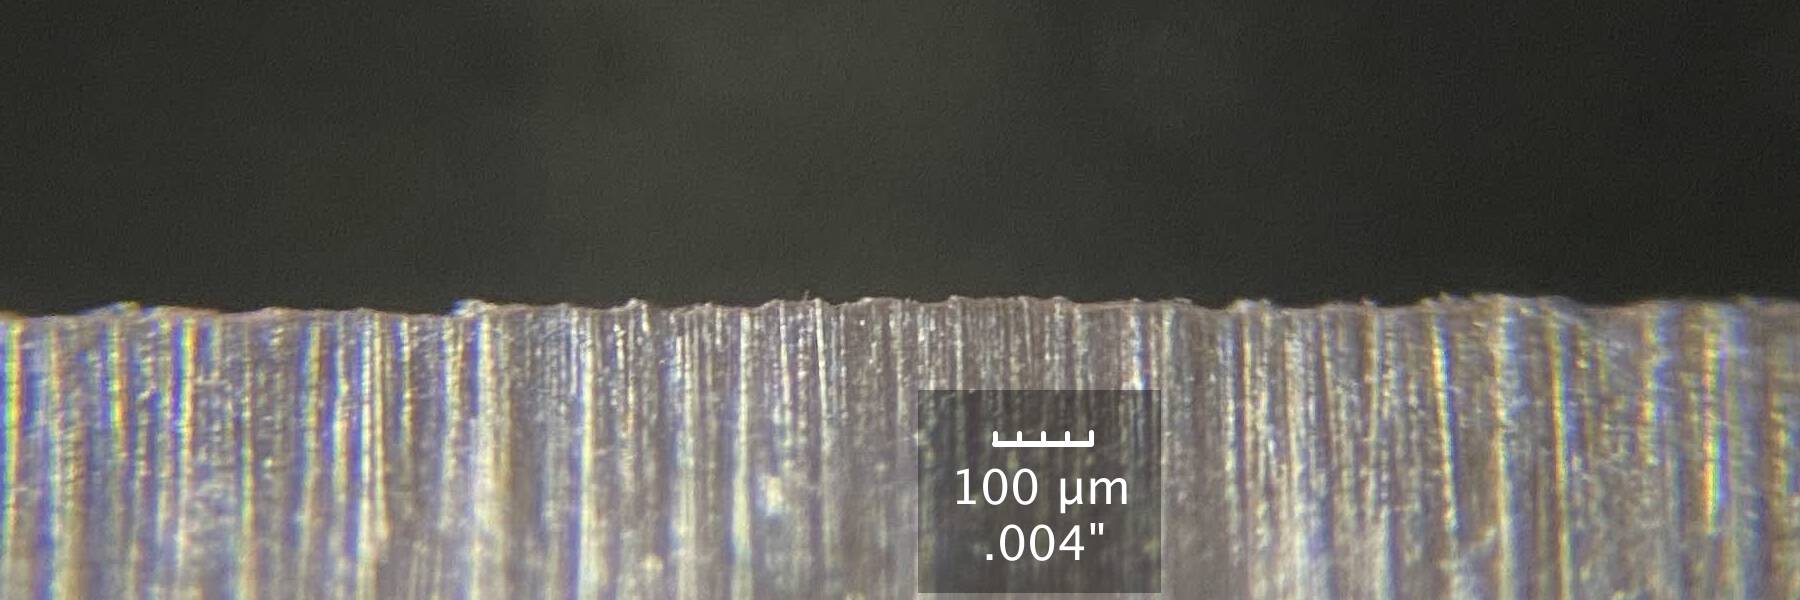
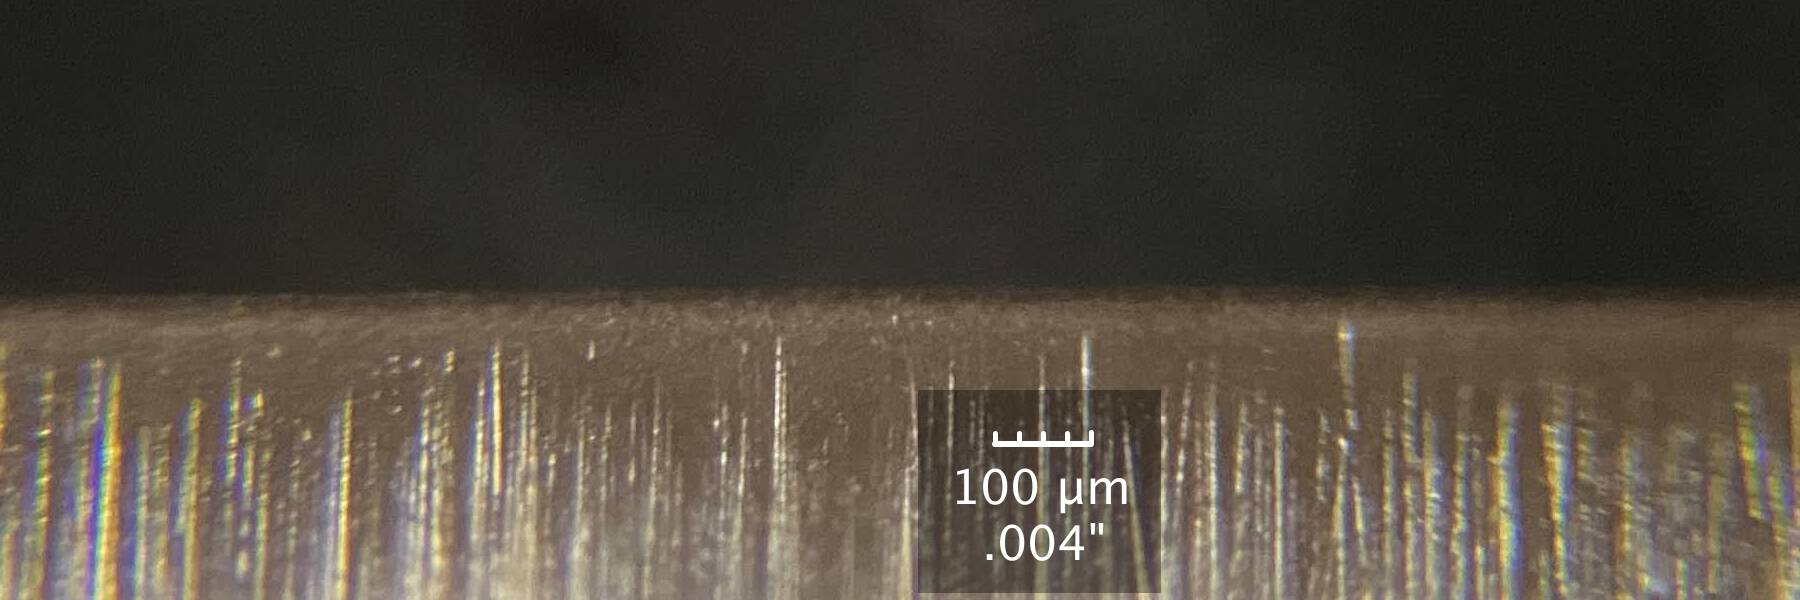
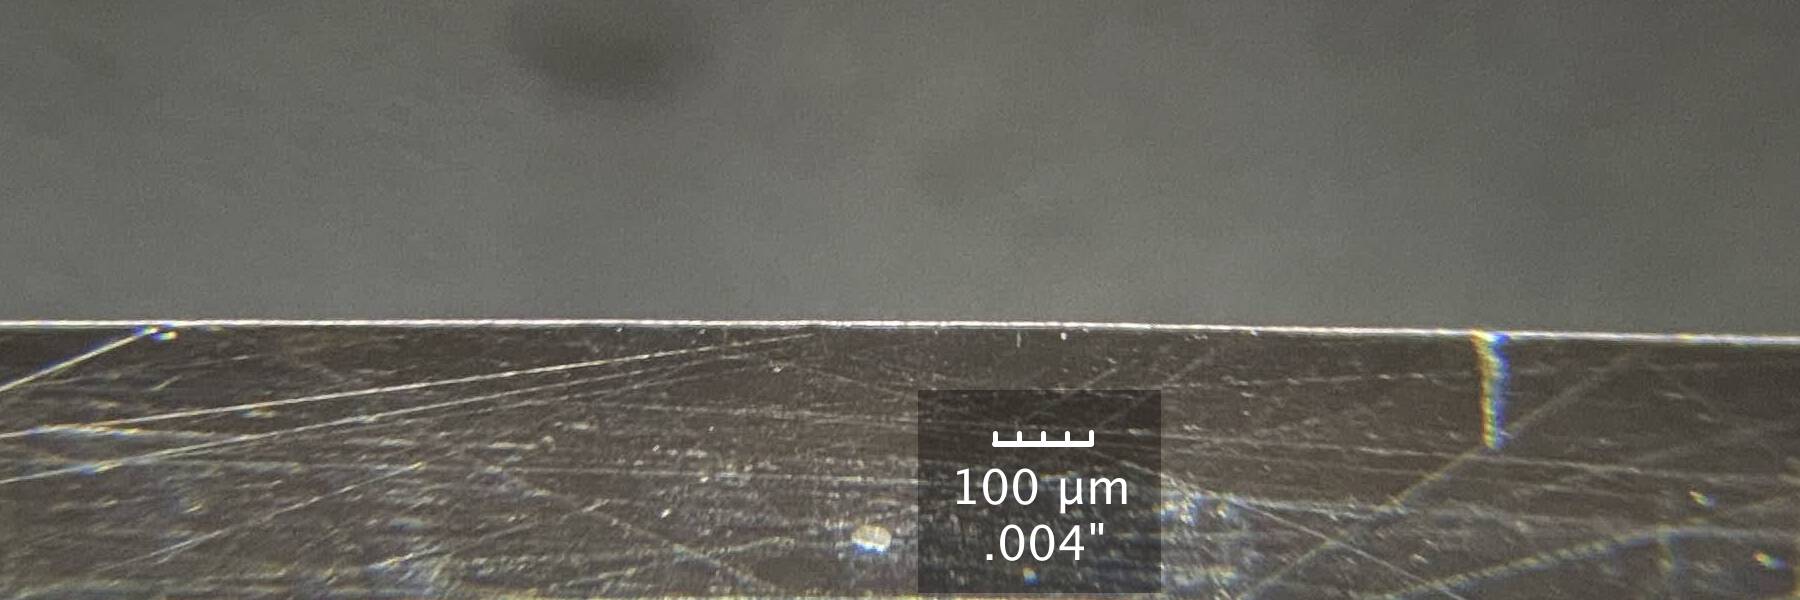
The first test was with the Buck Bros chisel. The bevel was 30 degrees, finished on a Shapton Pro 12000. You can see that, at the end, the edge has sustained a significant amount of damage and has folded in some parts.
| # of pieces chopped | Bevel | Back |
|---|---|---|
| 0 |
|
|
| 20 |
|
|
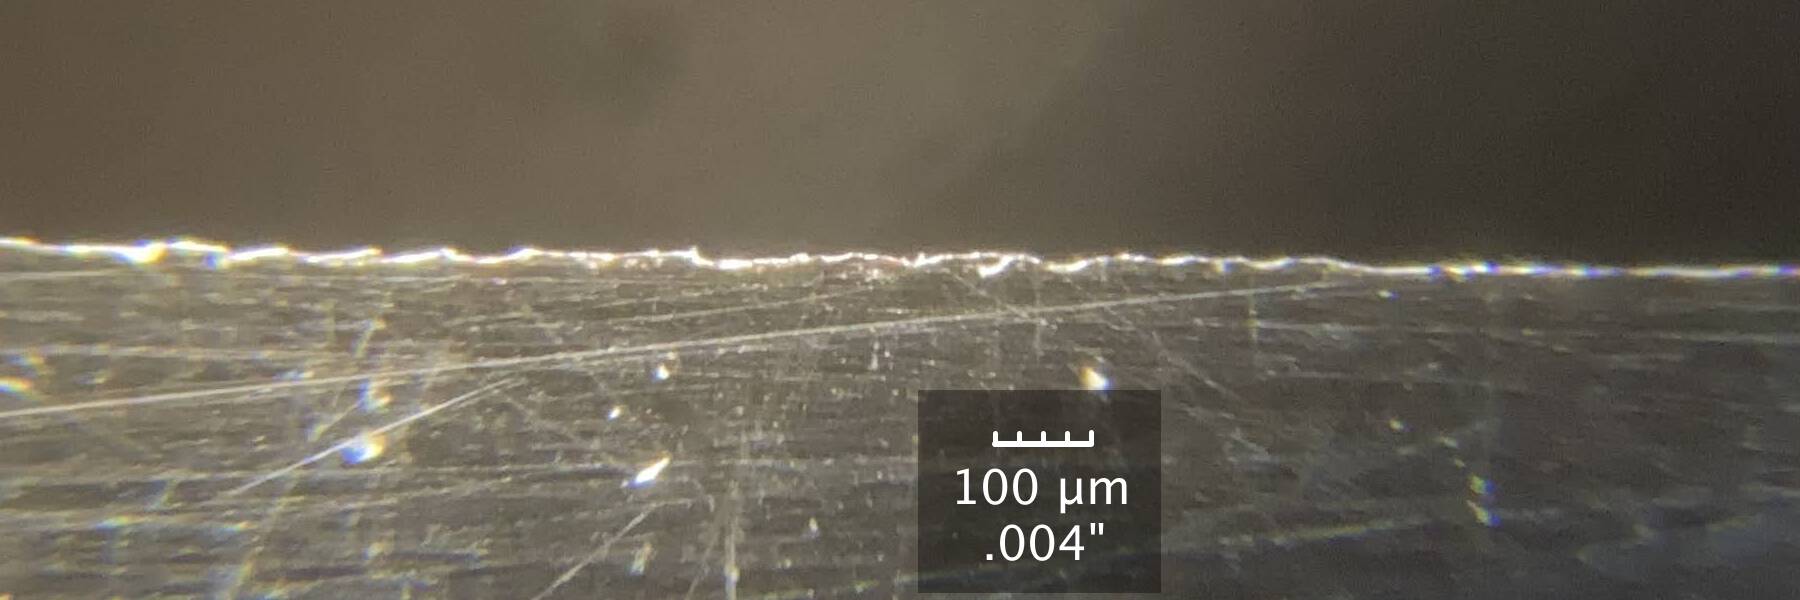
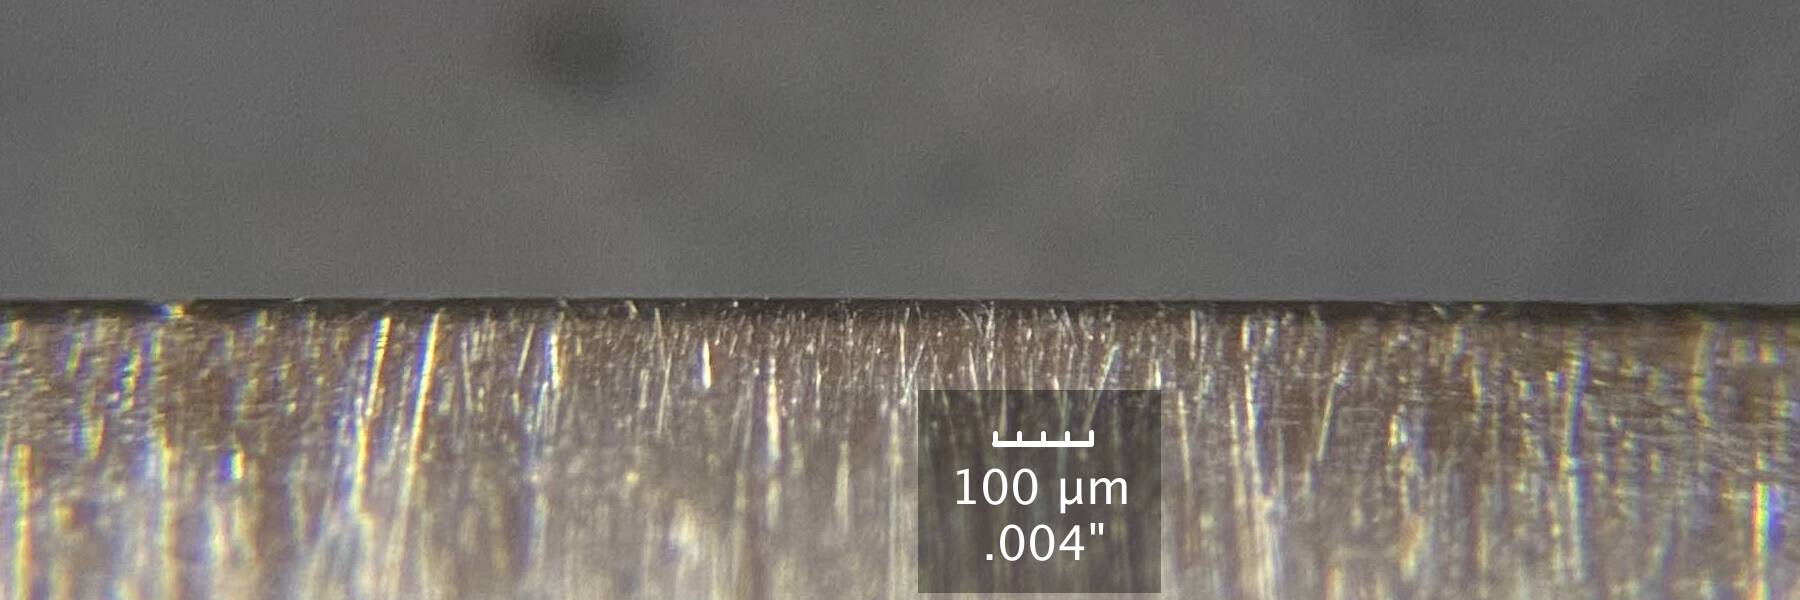
Buck Brothers, buffed bevel
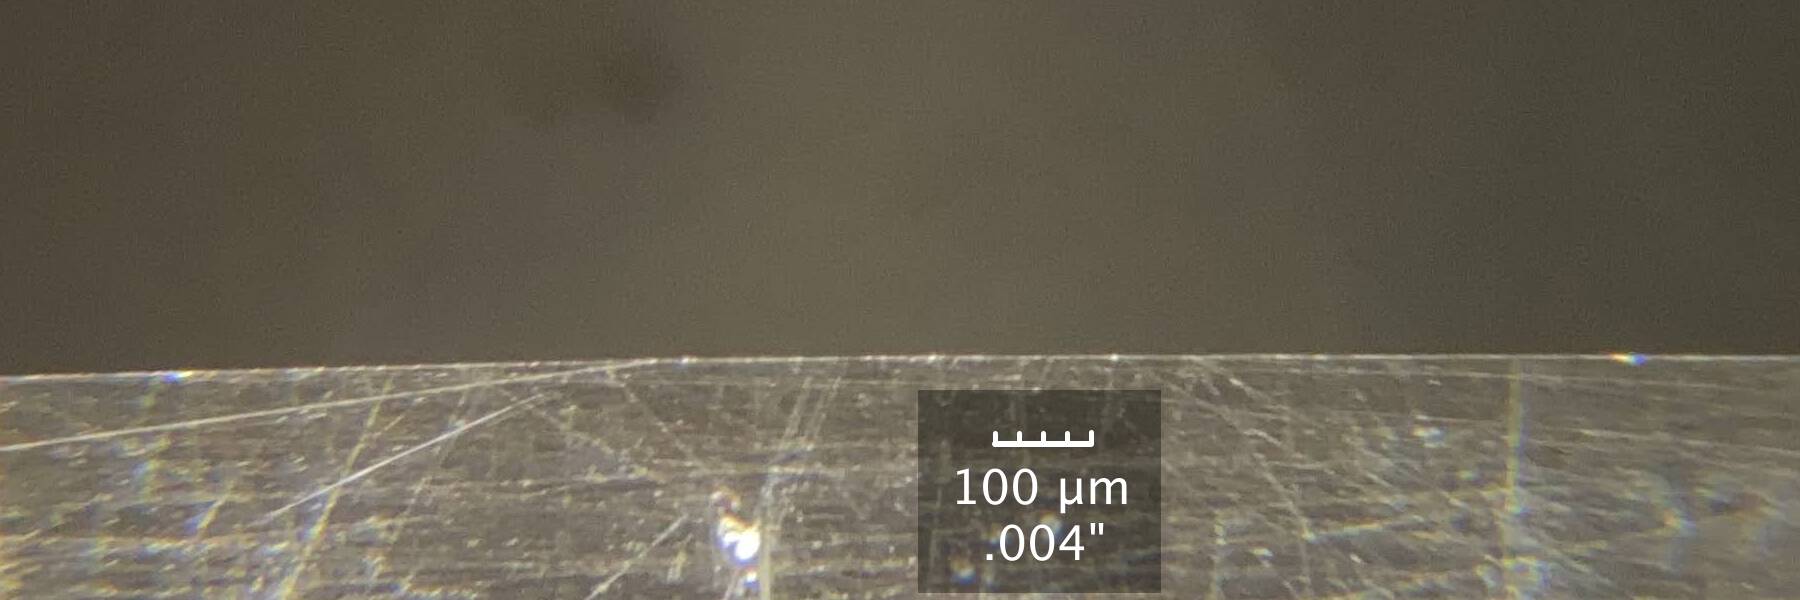
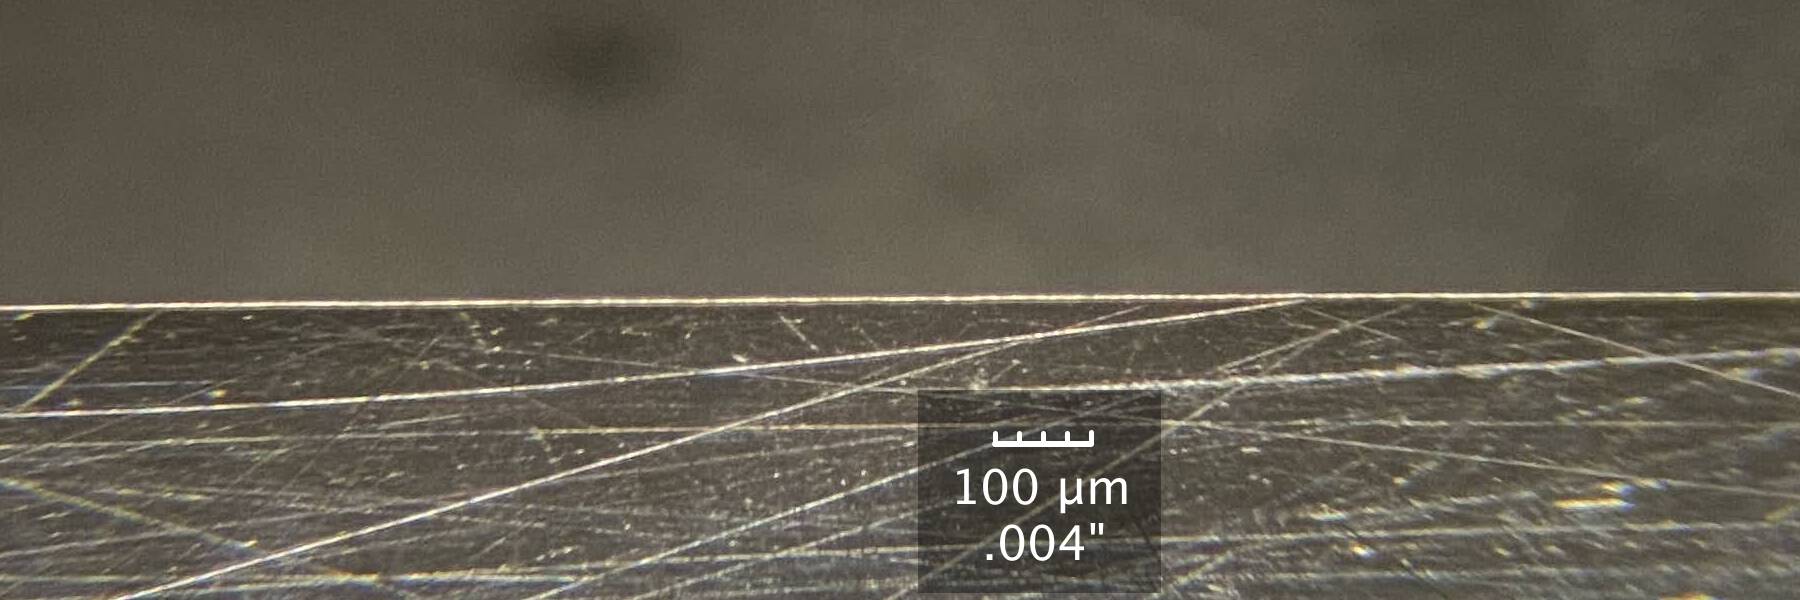
Here’s what the Buck Brothers chisel looked like with the buffed edge. Honed to 30 degrees on a Shapton Pro 1000, then buffed. (The lighting for the first bevel-side picture wasn’t very good. When I did this test, I was still figuring out how to take good photos.)
| # of pieces chopped | Bevel | Back |
|---|---|---|
| 0 |
|
|
| 20 |
|
|
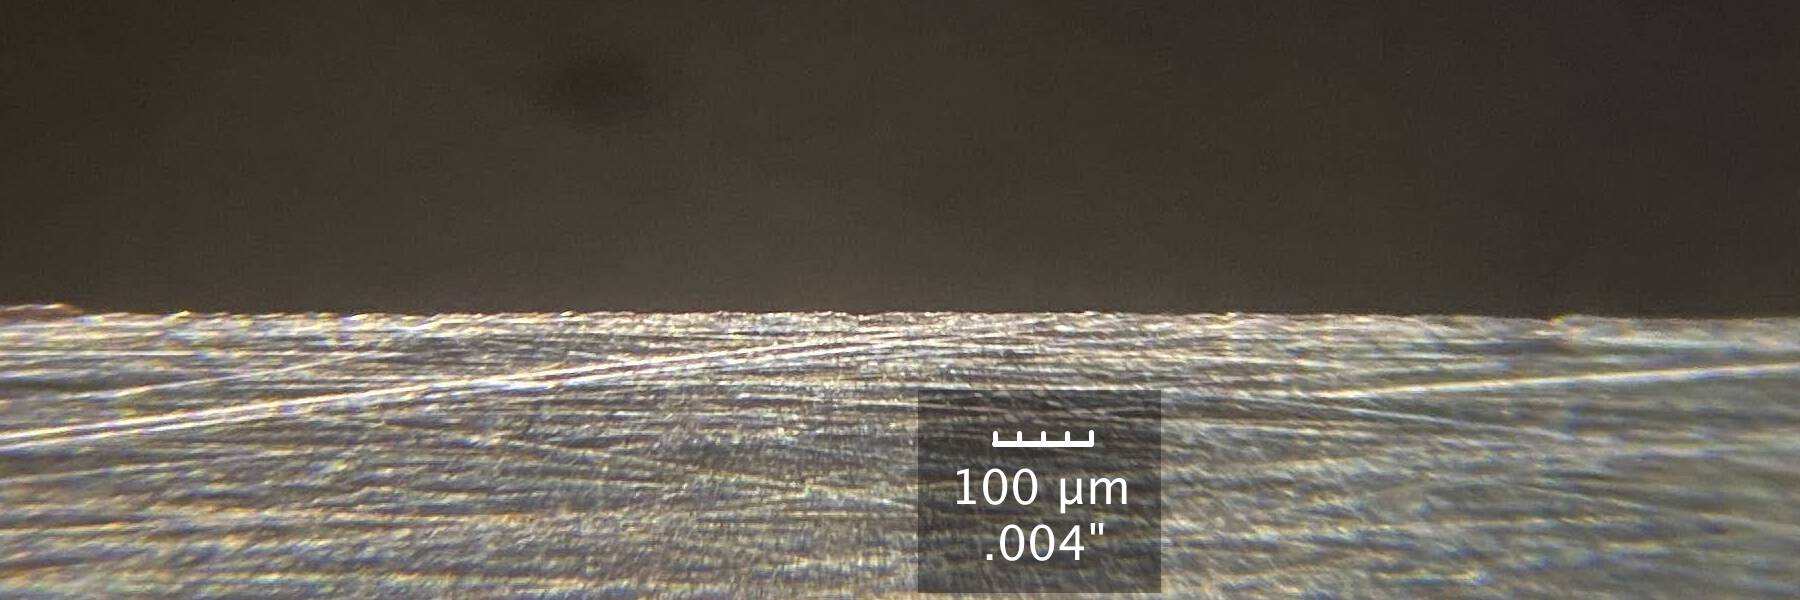
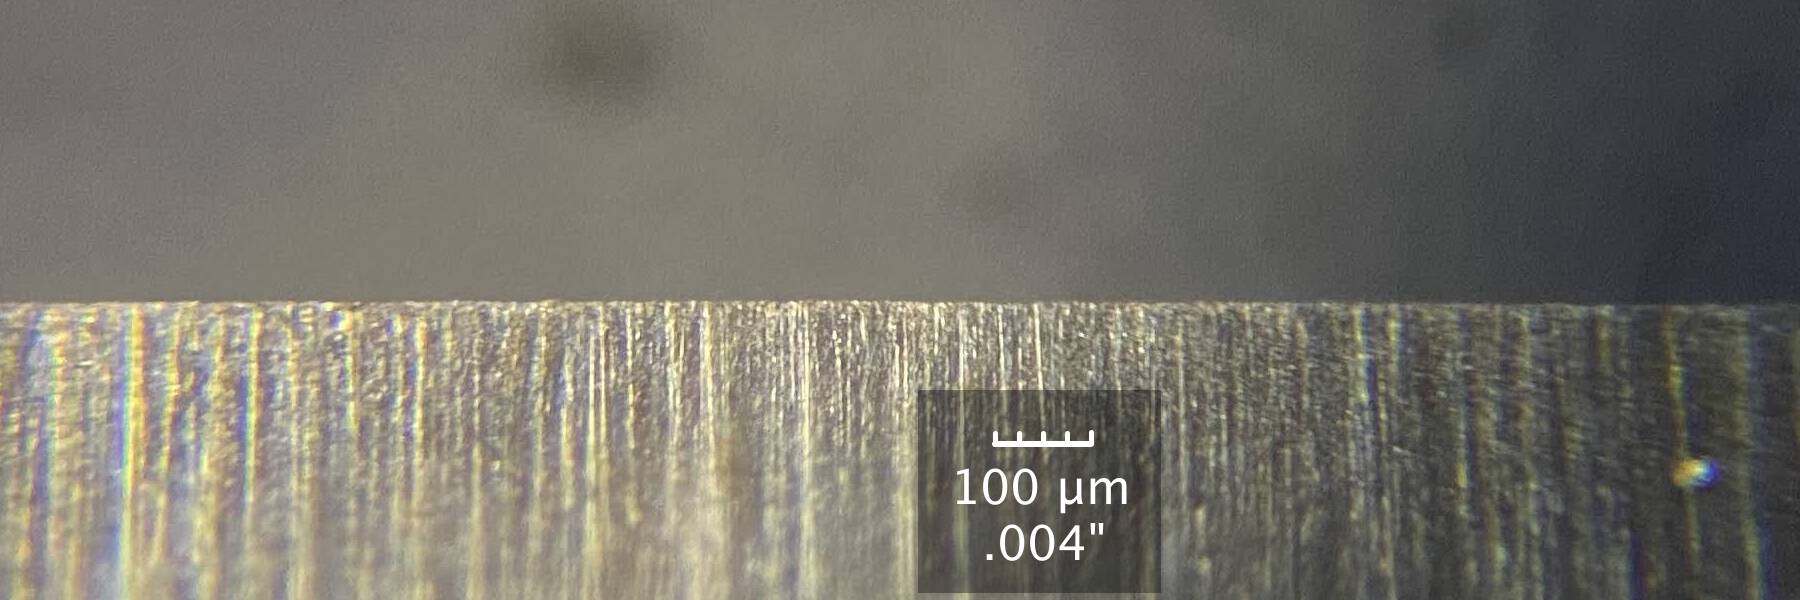
This is an enormous improvement over the flat-honed chisel. There is essentially no visible damage to the chisel, even under the microscope. I can tell by feel and by shaving that it’s not quite as sharp as it was to start with, but we’re talking going from extremely sharp (able to cut hairs without contacting skin), to just really sharp (able to shave hair just fine).
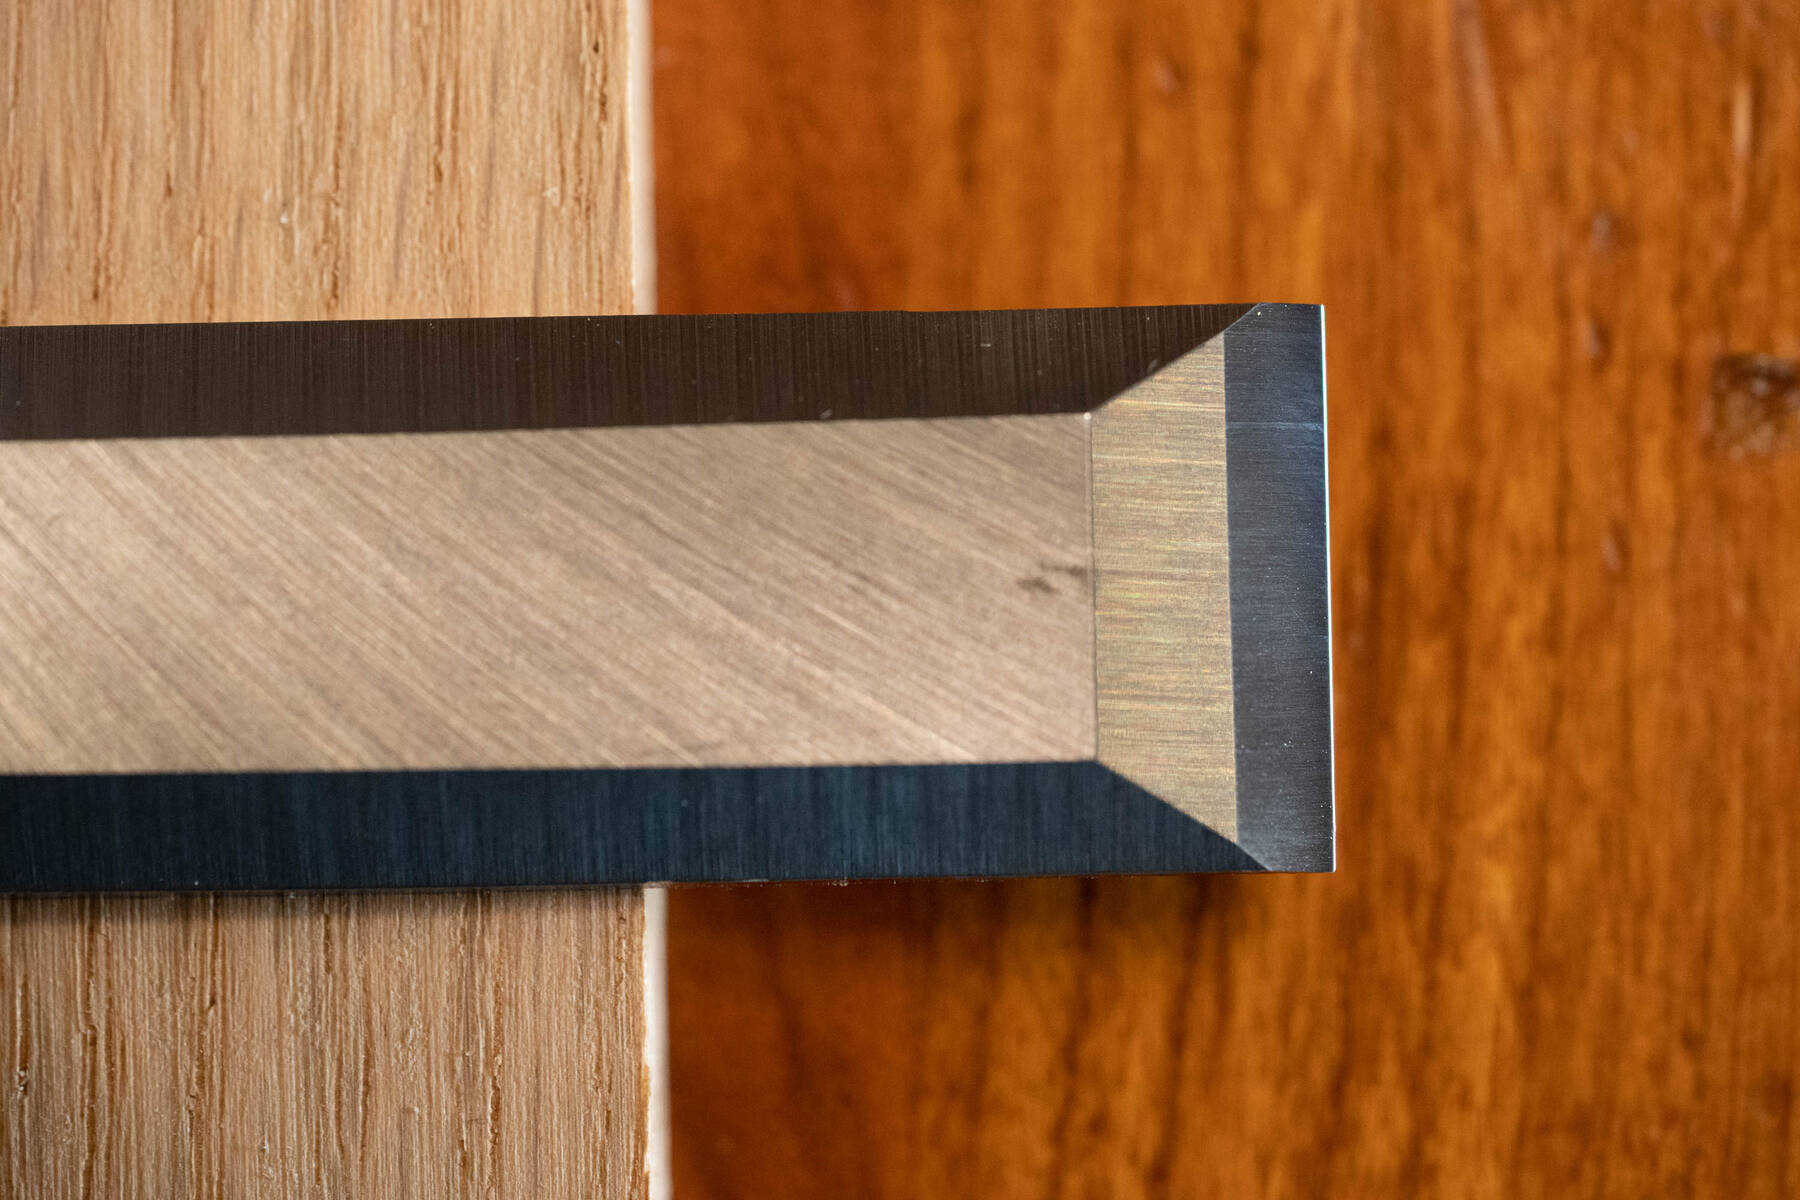
This is what the edge looked like at a more normal scale. There is a light off to the right, directly across from the chisel, so the reflection at the chisel’s edge is of that light.
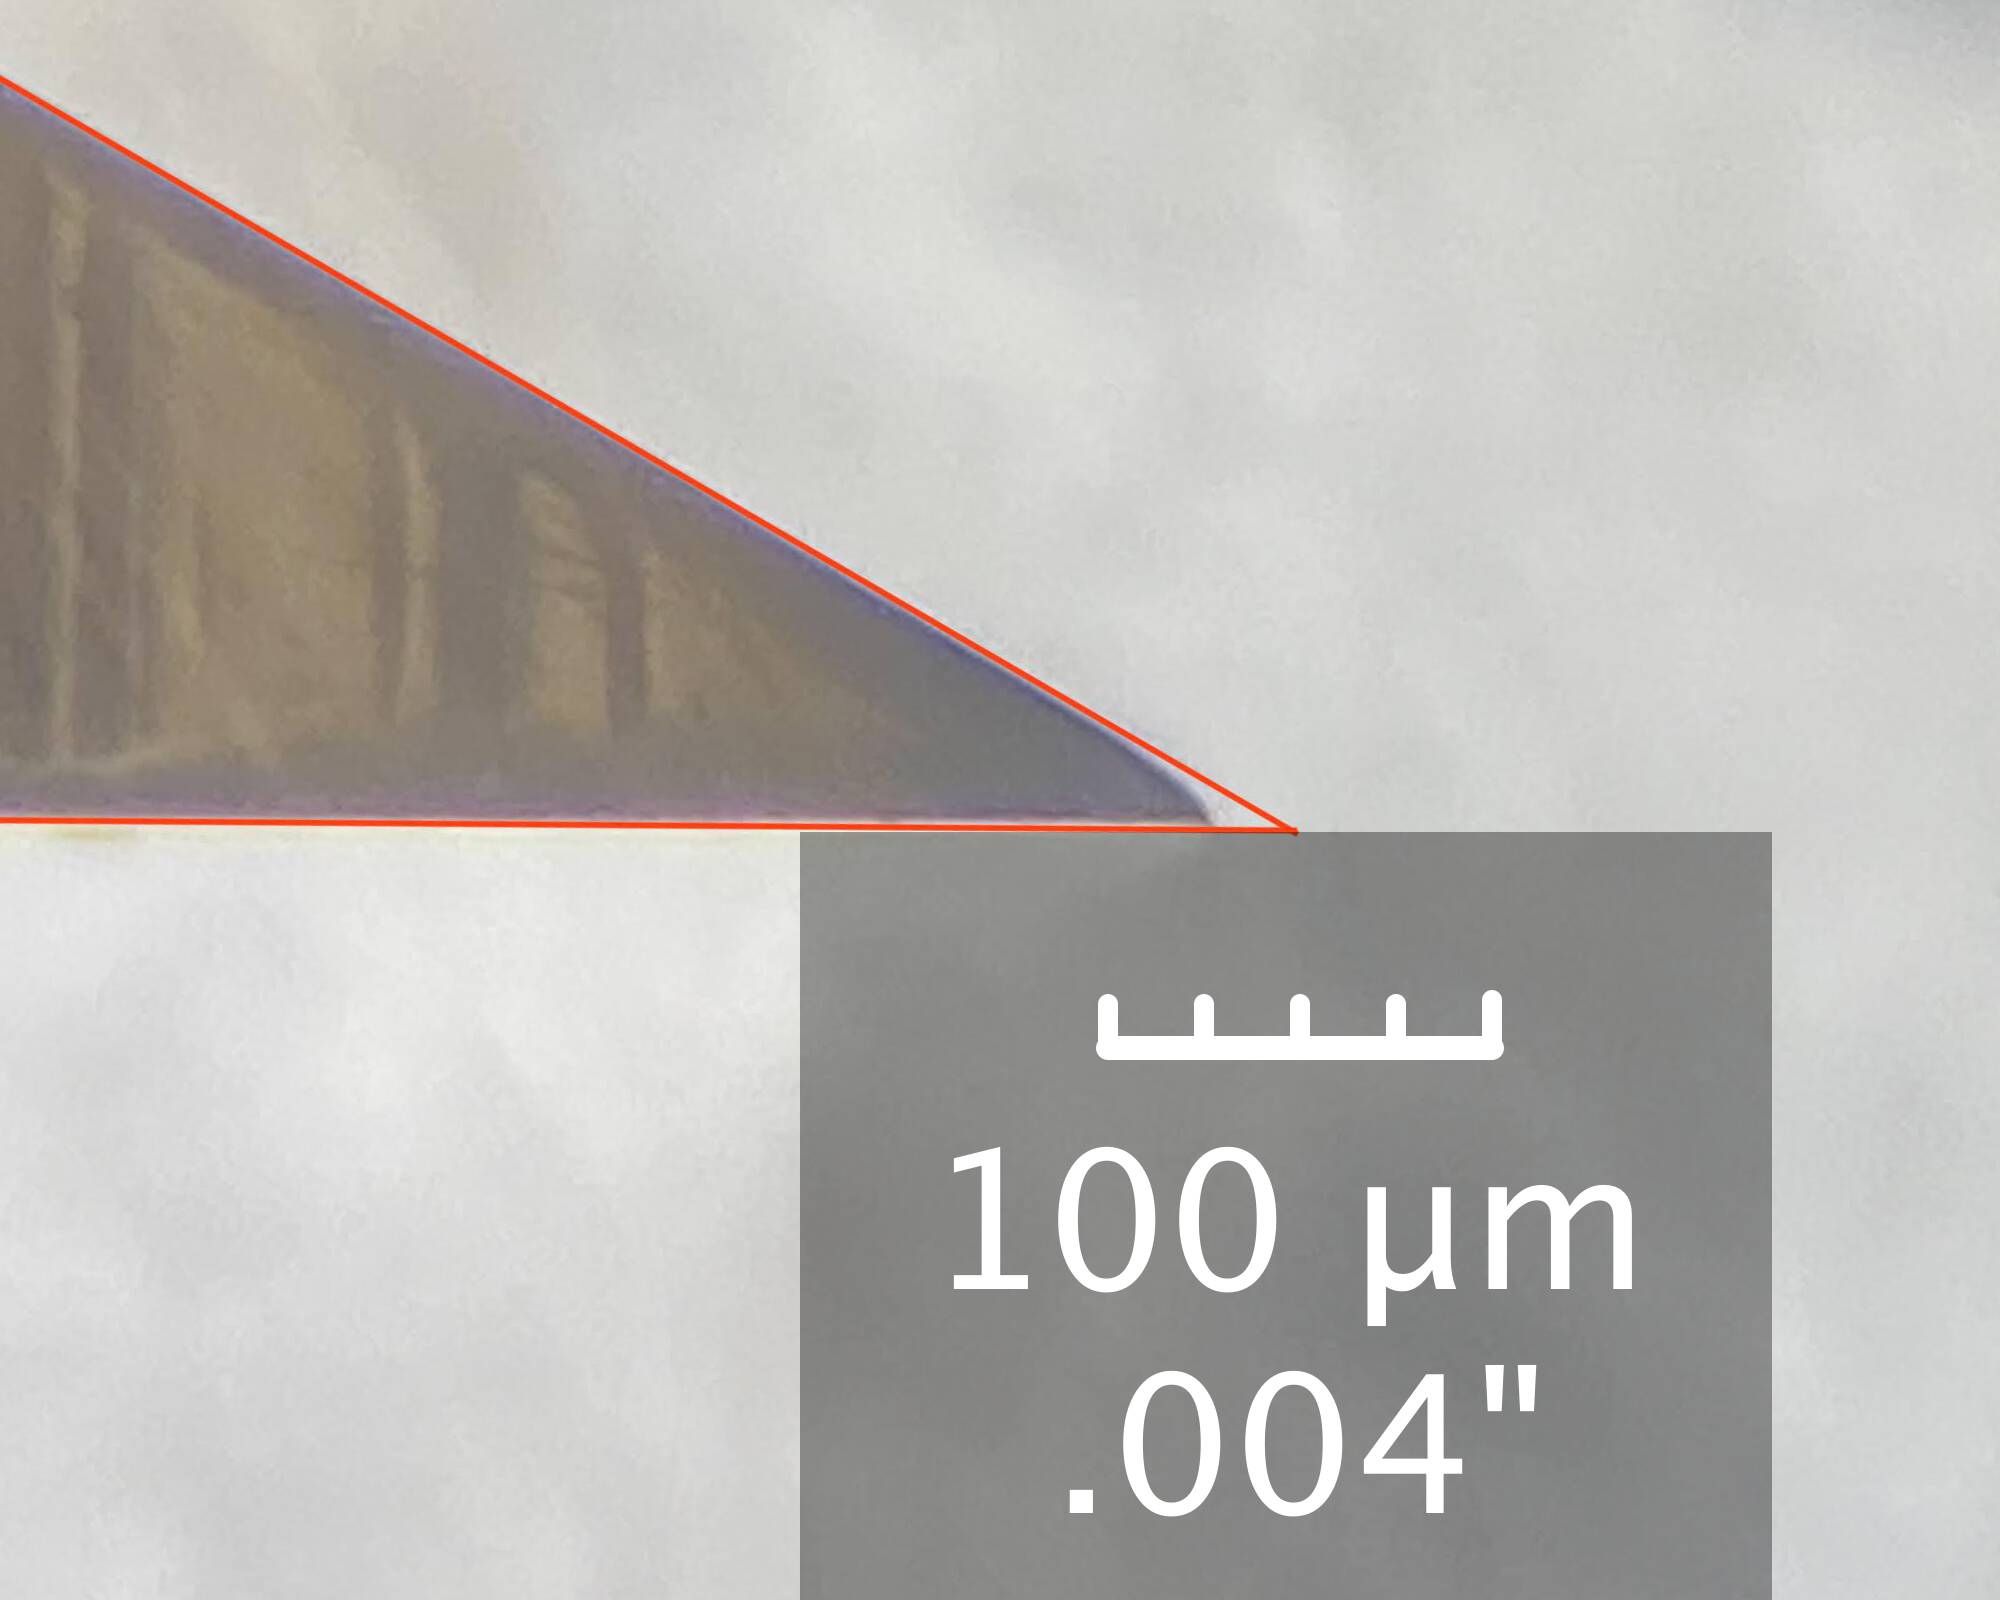
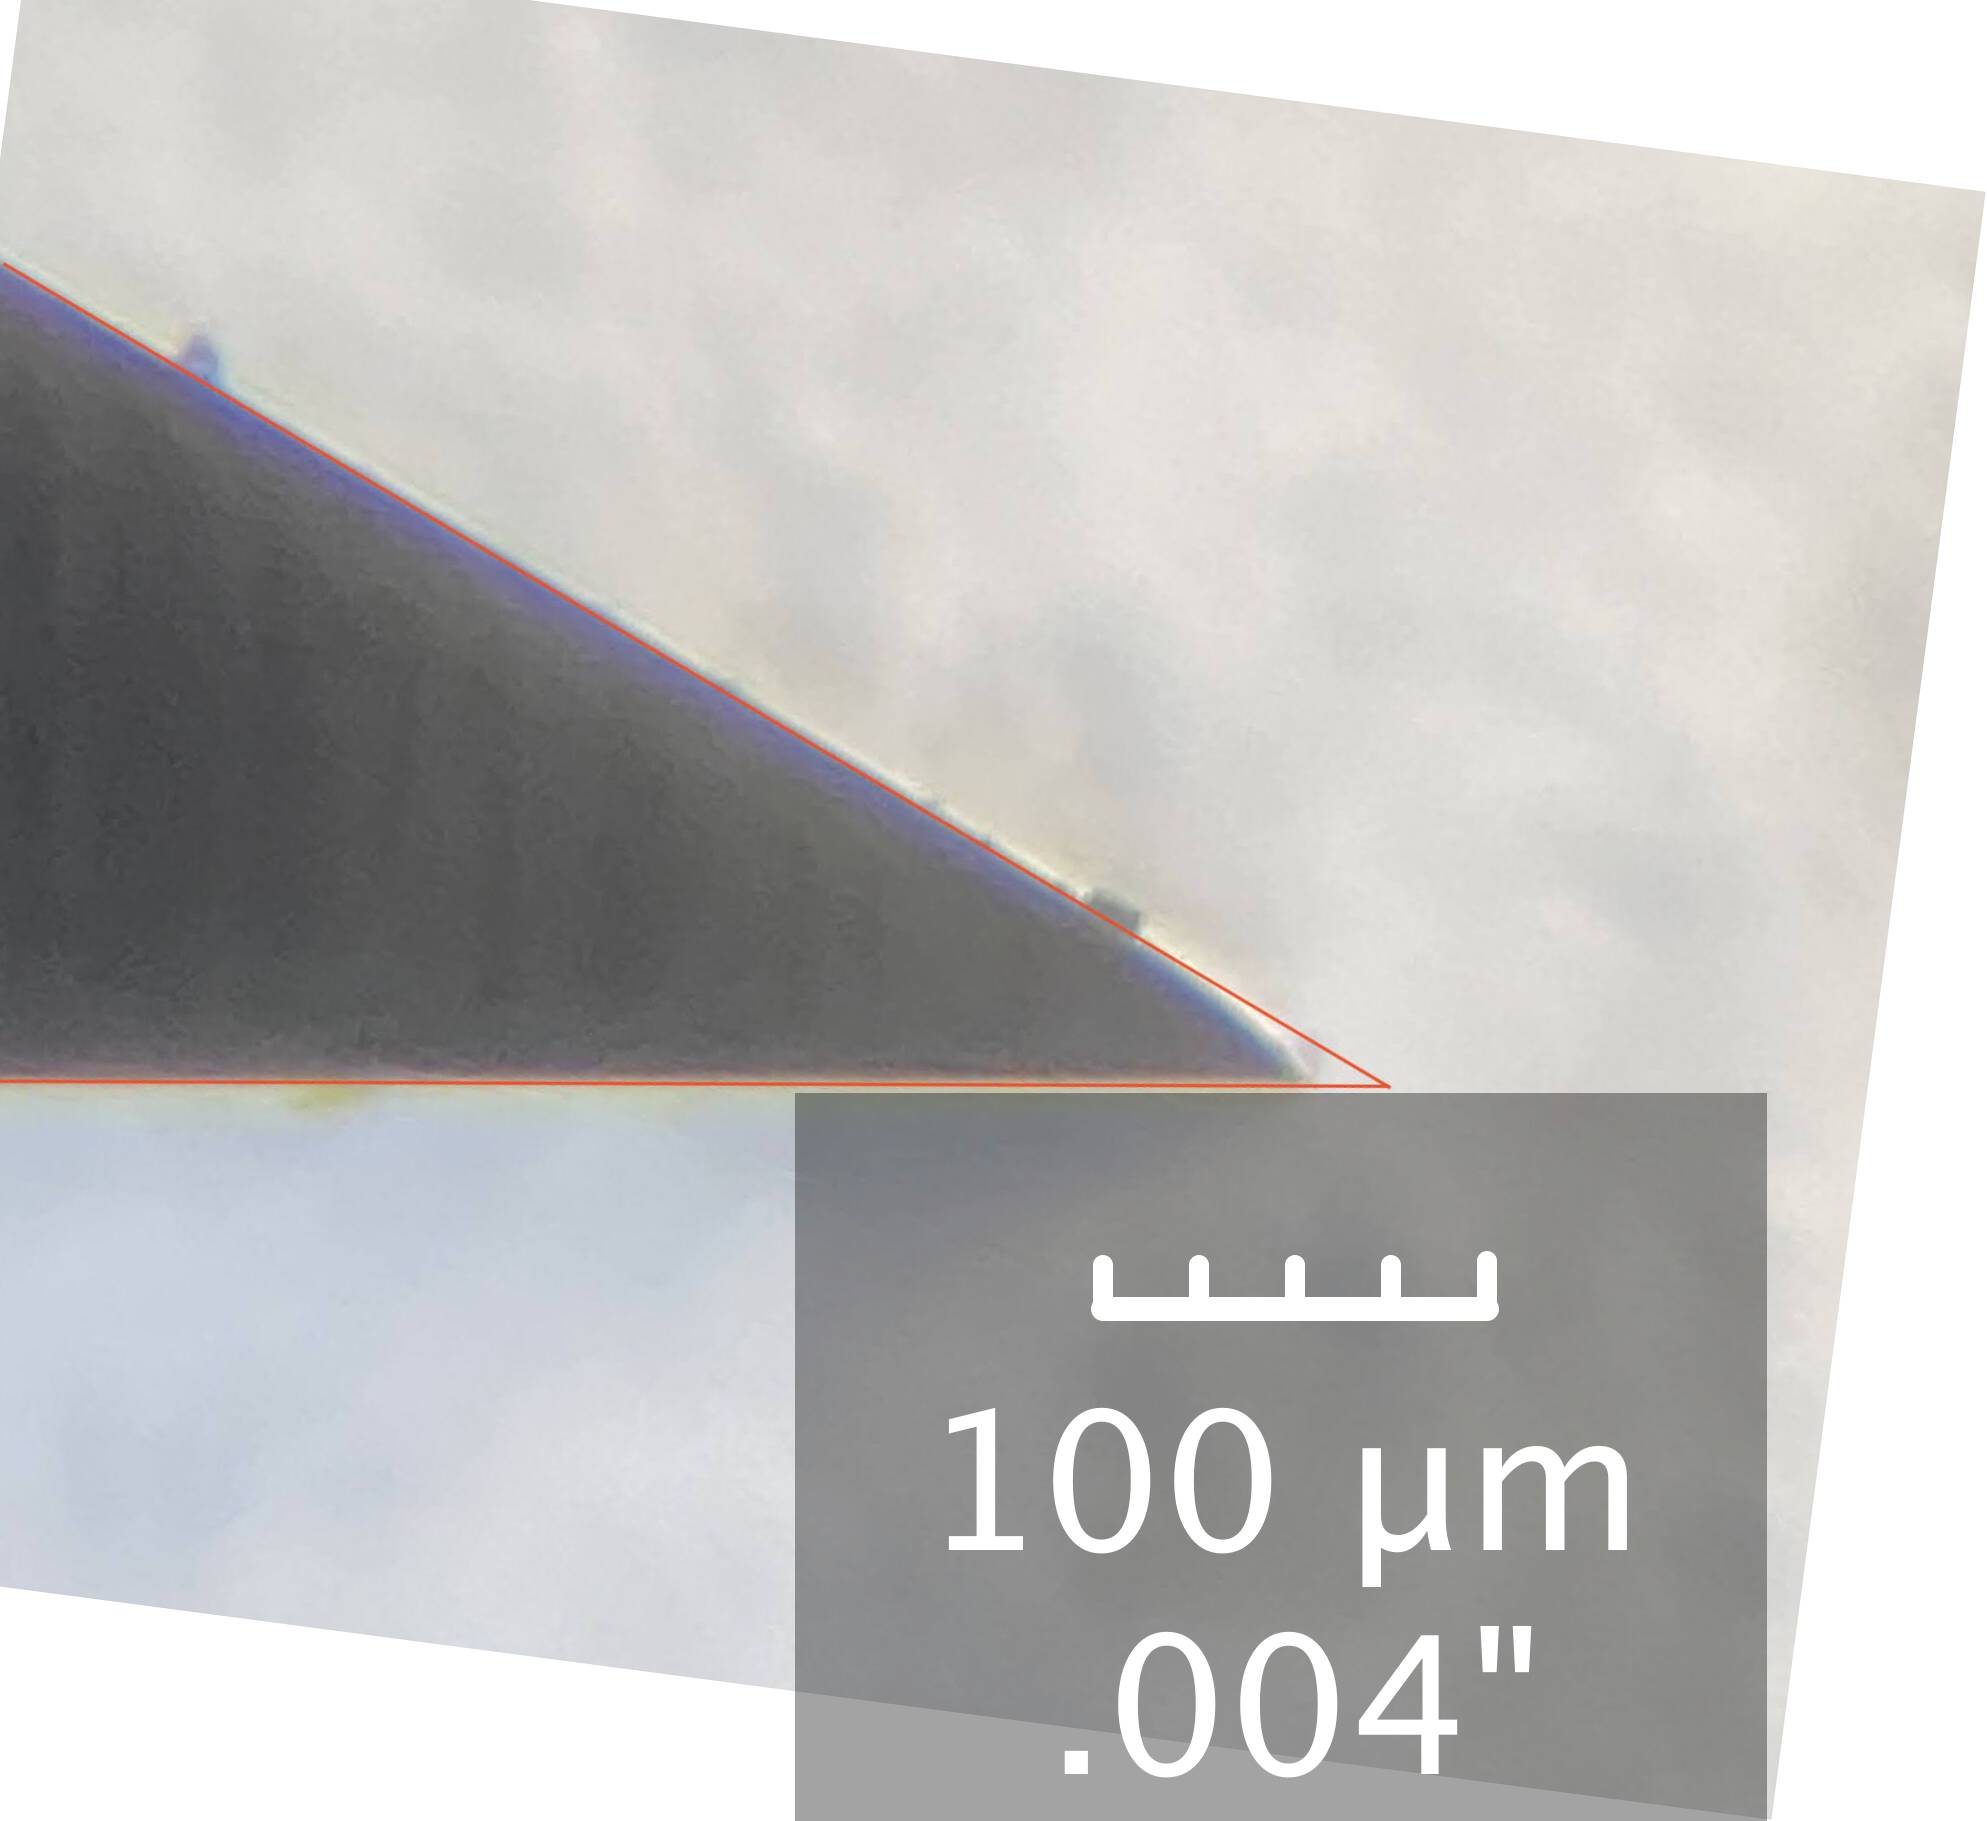
This is the profile of the chisel. The red lines show what the flat 30-degree profile looked like, before the chisel was buffed. Then angle right at the edge is very high, possibly higher than 60 degrees, although it’s hard to say for sure because of some blurriness at that scale.
Veritas PM-V11, flat bevel
The Buck Bros chisel is definitely not a high-end chisel, and I thought it would be useful to provide a premium chisel for comparison. Maybe a better chisel sharpened with a typical 30 degree bevel would hold up much better than the Buck Bros chisel, and perhaps it would be comparable to the buffed Buck Bros chisel.
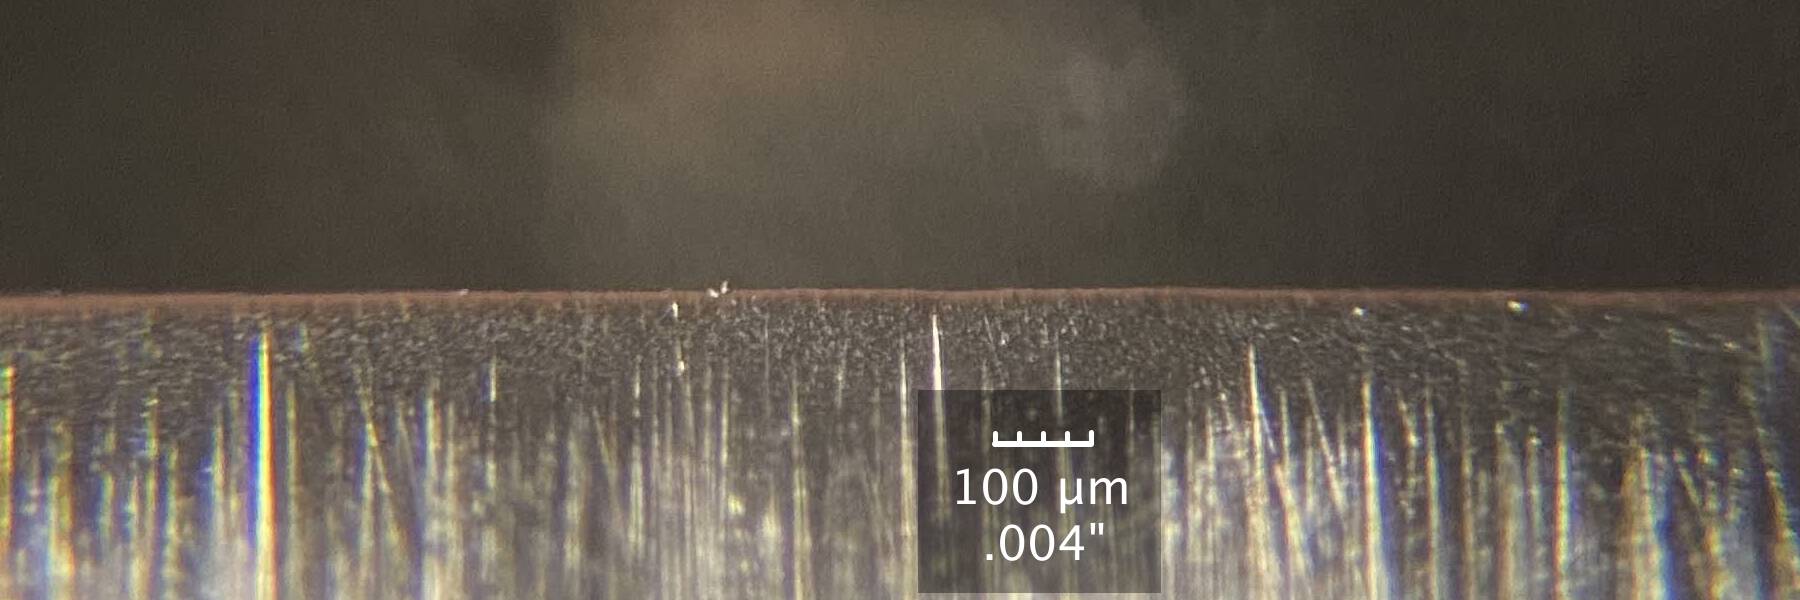
The PM-V11 chisels made by Veritas have a reputation as being among the most durable chisels available. They’re also very expensive, at about $100 each. This chisel was honed at 30 degrees and finished on a 12000 grit Shapton Pro.
| # of pieces chopped | Bevel | Back |
|---|---|---|
| 0 |
|
|
| 20 |
|
|
It’s obvious that the flat-honed Veritas PM-V11 chisel didn’t hold up as well as the buffed Buck Bros chisel.
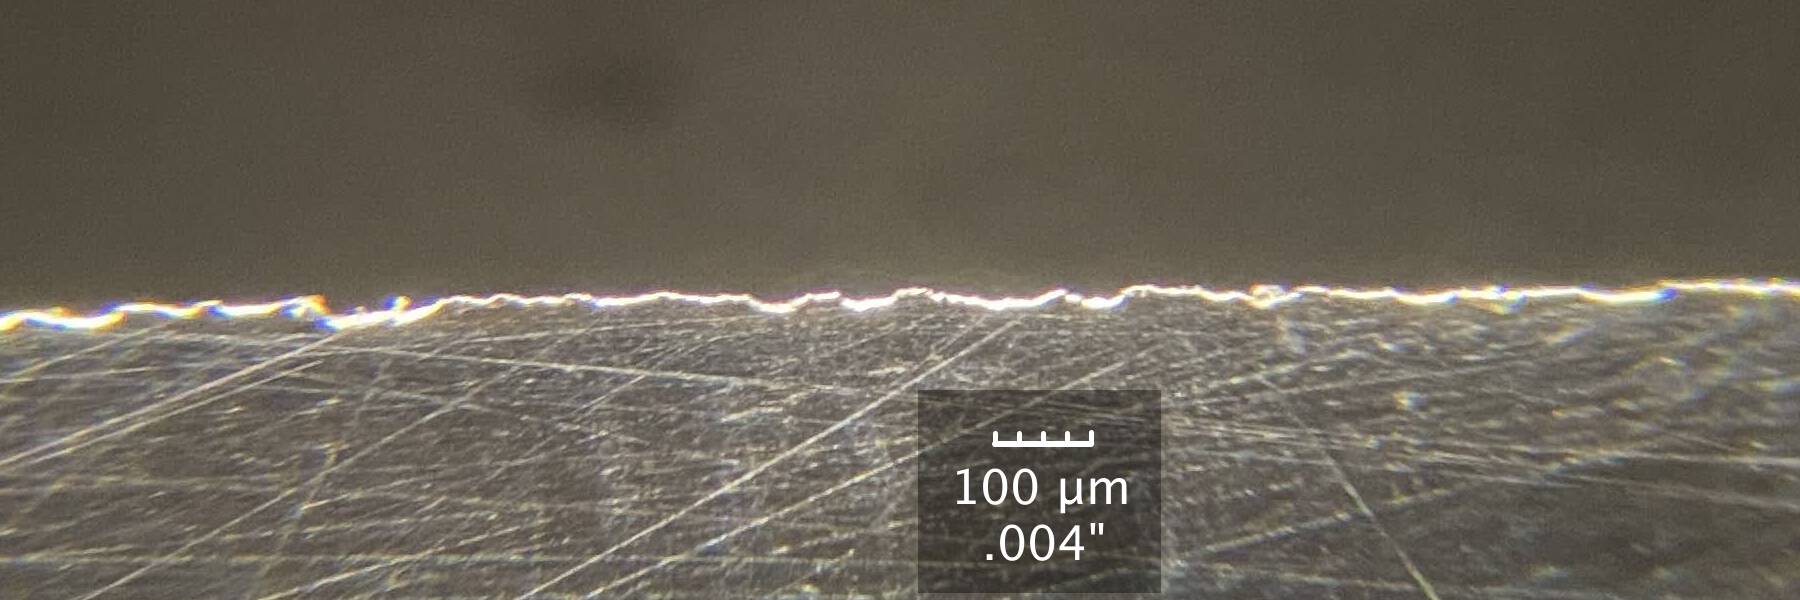
A quick look at the pictures of the flat-honed Veritas makes it seem like it was as damaged as the flat-honed Buck Bros, but I don’t think that’s the case. Or at least, I think the nature of the damage was different. I think the Veritas was more jagged and the Buck Bros was more folded. Just speculating: I think the PM-V11 is chipping on a small scale, which leaves jagged edges that are still helpful for cutting. Subjectively, this chisel felt sharper than the flat-honed Buck Bros after chopping. But it of course didn’t compare to the buffed Buck Bros chisel.
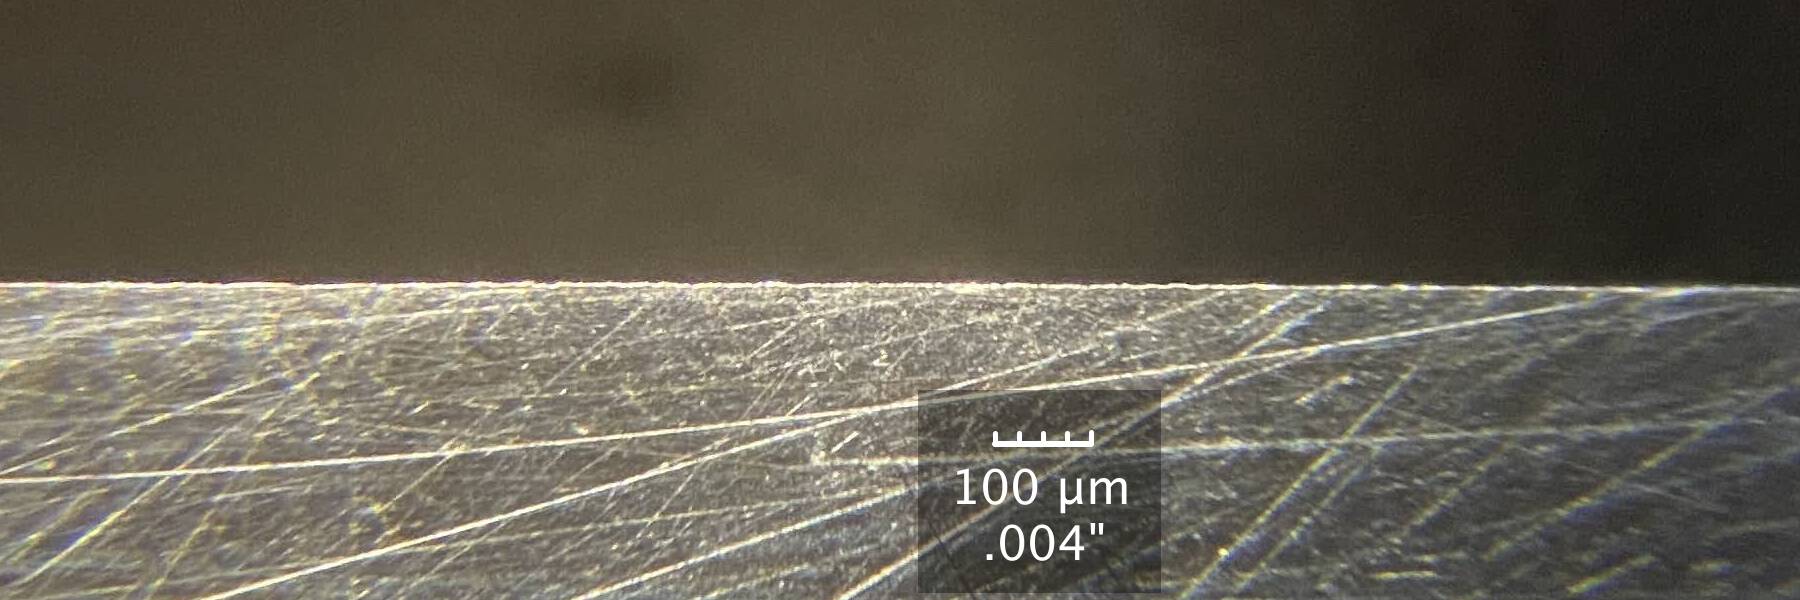
To get a sense of how the microscope view of the damage corresponds to a normal-scale view, here’s a picture of what the chisel looked like at a more familiar scale. Again, there is a light off to the right, directly across from the chisel. The reflection of that light shows the damaged edge (on the freshly sharpened chisel, there was no visible reflection from that light).
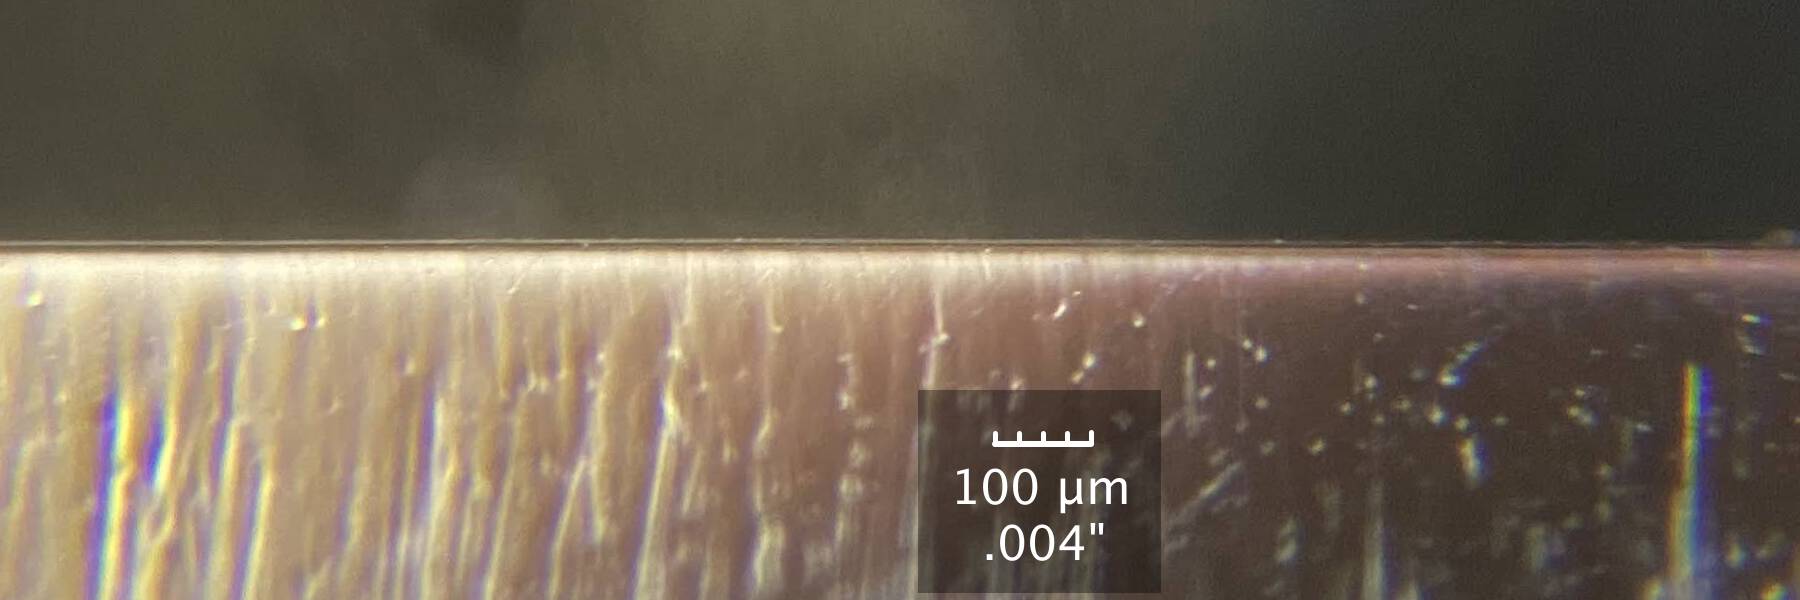
Veritas PM-V11, buffed bevel
This is the same PM-V11 chisel as in the previous test. This time, it was honed on a 1000 grit Shapton Pro, then buffed. It needed to be buffed about twice as long as the Buck Bros chisel to get the same effect.
(The first bevel photo was not lit very well, so it’s hard to see the shape of the very edge.)
| # of pieces chopped | Bevel | Back |
|---|---|---|
| 0 |
|
|
| 20 |
|
|
As expected, the chisel went through this test with essentially no damage. There is some waviness at the edge at the end, but I think that may have been present at the beginning – it does not look like the edge damage I’ve seen anywhere else.
At the end, this chisel seemed subjectively slightly sharper than the buffed Buck Bros chisel – it feels sharper and can shave hair a bit more easily. But those differences are trivial compared to difference between buffed vs. unbuffed chisels.
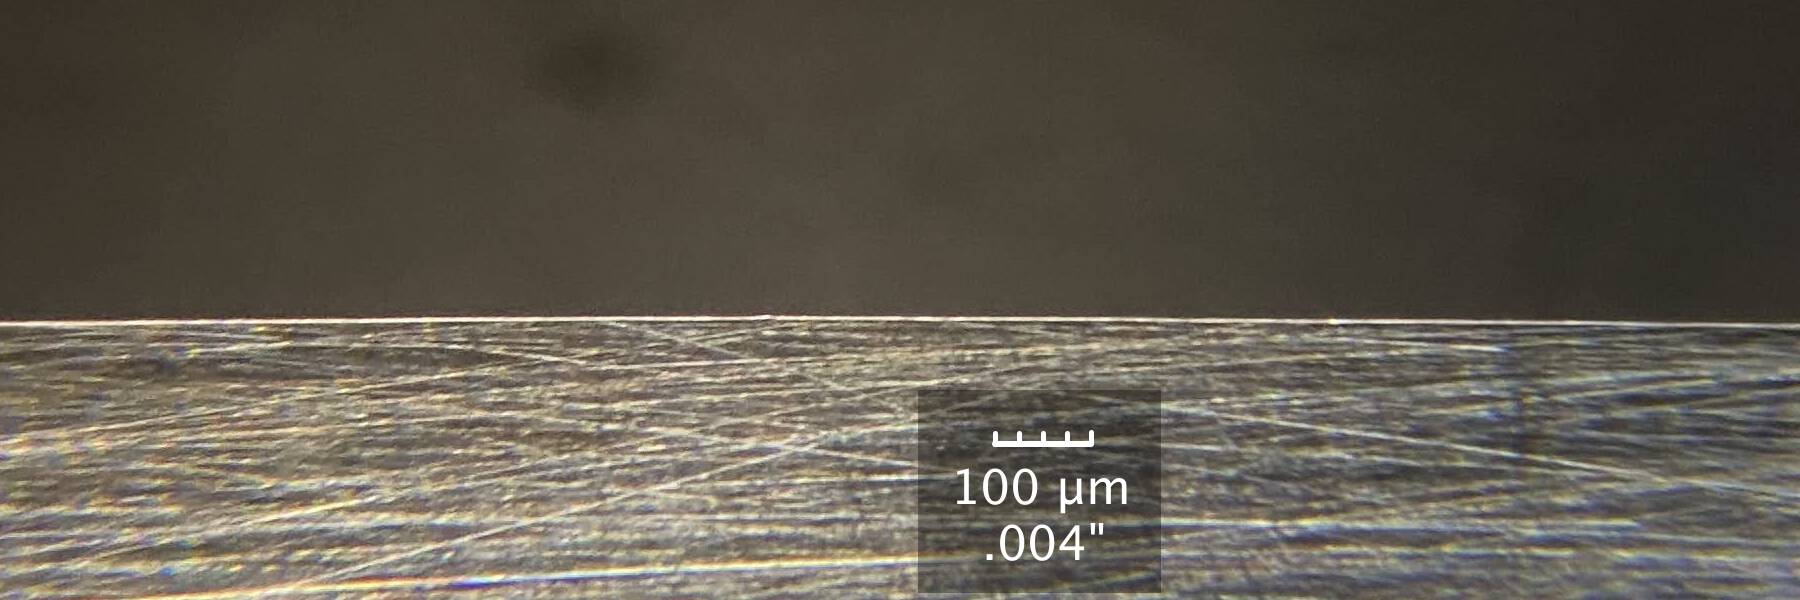
Buck Brothers, stropped
In microscope pictures of the profile of a buffed blade, I saw that the angle very close to the edge (within .001") was very high, 50 degrees or even more. I wanted to see if stropping at a high angle could provide a benefit similar to buffing, by creating a similar high-angle micro-micro-bevel.
Using the Buck Bros chisel, I honed the 30 degree bevel on a Shapton Pro 1000, then I stropped it at about 40-45 degrees, using a strop loaded with 1 micron green compound made by JacksonLea (ordered from McMaster-Carr). I used light pressure stropping, about the same as if I were drawing a line with pencil on paper. To remove any burr, I lightly stropped the back of the chisel a couple of times, and then did a couple passes on the bevel and then the back again.
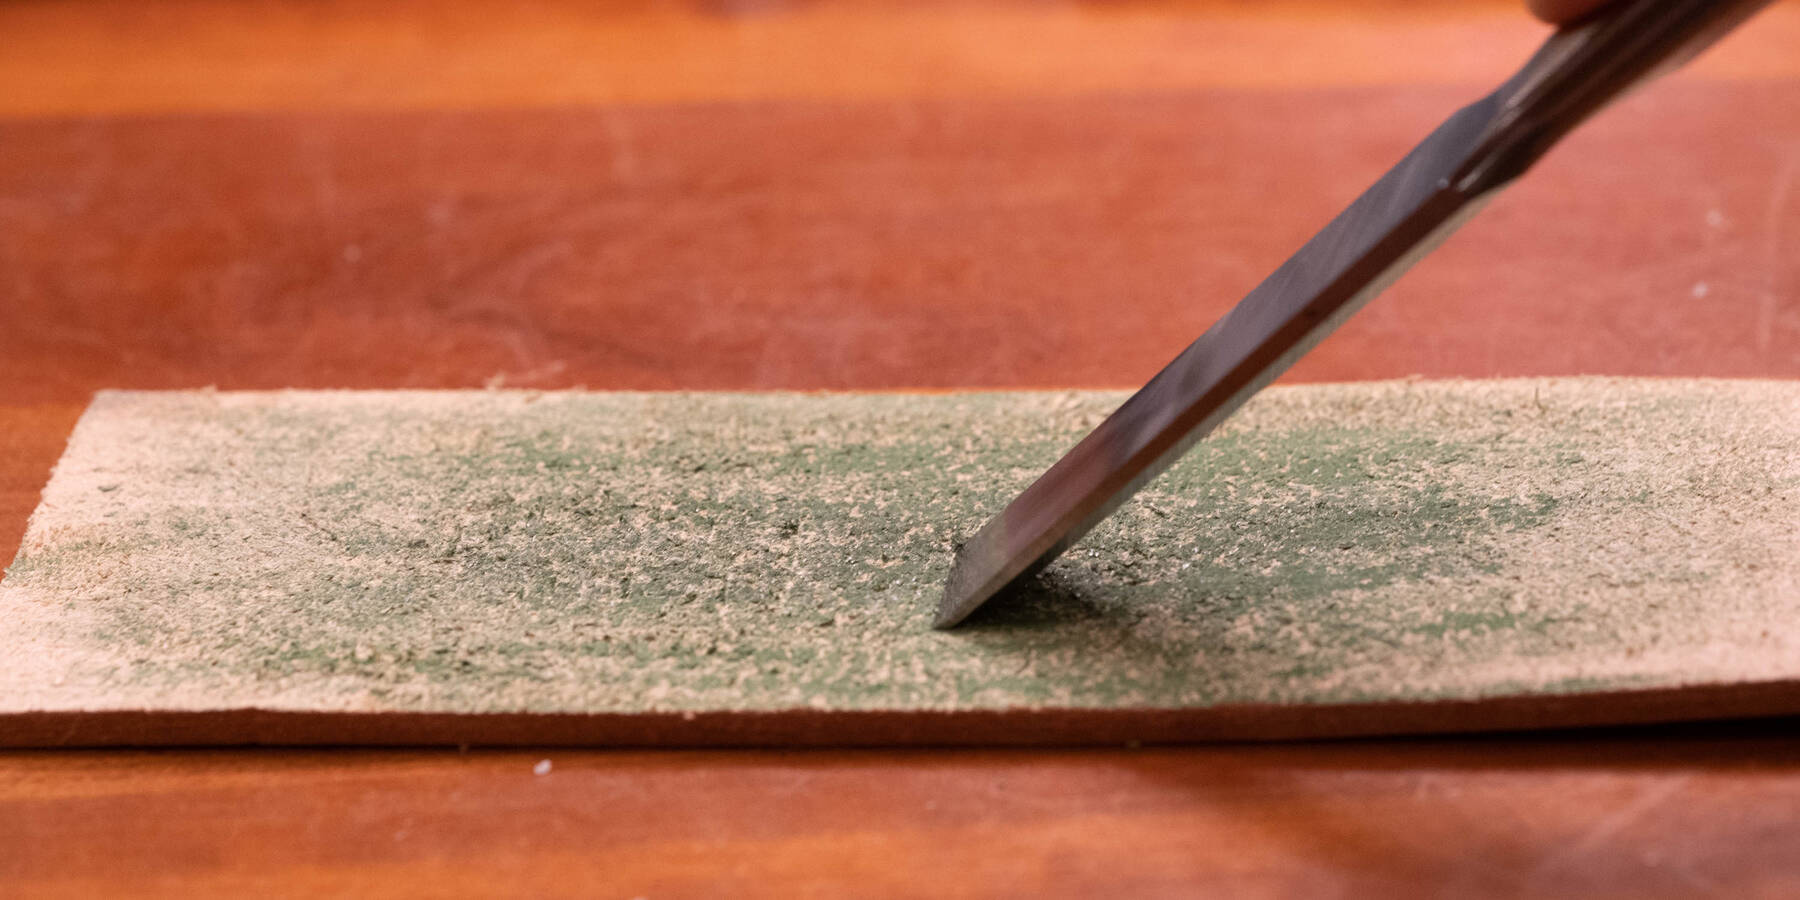
After stropping, the reflection from the edge looked like this. (If you want to do this, I can’t recommend an exact procedure because the speed of stropping can vary due to pressure, type of compound, amount of compound, etc. But what you want is for the chisel to look something like this.)
I actually ran two tests with a stropped chisel. With the first test, I didn’t get quite the edge durability that I had hoped for, so I honed it and stropped it again, but this time I slathered on more of the green compound, and I stropped more times – maybe 20 or so.
The result: it held up almost as well as when buffed. It’s possible that more stropping, or stropping at a higher angle, would have done better, but I don’t know for sure. It’s still miles ahead of the flat-honed chisel, and close enough to the buffed chisel that I think it’s a usable alternative.
In the pictures below, you’ll see that the initial condition of the edge isn’t quite as good as the buffed chisel, and it develops a bit more damage. Again, it’s possible that more stropping could help.
| # of pieces chopped | Bevel | Back |
|---|---|---|
| 0 |

|

|
| 20 |
|

|
At the end, the chisel could still easily shave hair. To the naked eye, it looked completely undamaged. Under the scope, you can see there was a little edge damage, but still almost nothing compared to the flat-honed chisel.
One thing I’ve learned from this experience and others, if the edge isn’t as durable as I expect, I just go back and do more stropping/buffing, and it helps.
This is the profile of the chisel after stropping. The angle at the edge is about 50 degrees. It’s possible that the reason the stropped chisel didn’t hold up quite as well as in the buffed condition is that the angle here is lower than the buffed chisel, which was greater than 60 degrees.
I should mention that David Weaver and Steve Voigt both said that they have encountered issues with strop contamination in the past, where bits of metal (like burrs that have come off) remain on the strop and scratch up an edge. This could cause a problem for tools that are used for final show surfaces, like plane blades used for finishing, or chisels used for paring finish surfaces. For most chisel uses, however, I wouldn’t expect that it would cause problems.
Equipment
A wide variety of equipment can be used to create the microconvex “unicorn” bevel.
This what I used in these tests:
The buffing wheel from this kit is probably a bit softer than is ideal, but it still works well.
I have also used the following, which seems work slightly better:
- Drill
- 6" diameter 1/2" thick stiched cotton wheel
- 1/2" Arbor (for attaching buffing wheel to drill)
- 1-micron green buffing compound by JacksonLea
For stropping, I used:
- Leather strop
- 1-micron green buffing compound by JacksonLea
David Weaver uses:
- Harbor Freight 6" buffer
- 1/2" wide stitched cotton (white) or stitched shellac cotton (yellow) buffing wheel. From the picture, it looks like the stitched wheel that comes with the buffer is probably fine.
- 5-micron yellow buffing compound by JacksonLea
Bill Tindall has used the same equipment as David Weaver, and he has also had success with rocking the blade on a fine sharpening stone for a few pulling strokes followed by a few rocking strokes on a strop.